Installation
Intruction
Install on Linux
Install on Kubernetes
Related Tools
Cluster Operation
Quick Start
Cluster Admin Guide
Multi-tenant Management
Platform Management
Infrastructure
Monitoring Center
User Guide
Storage
Configuration Center
Project Settings
Development Guide
API Documentation
Integrating Harbor Registry
Harbor is an an open source trusted cloud native registry project that stores, signs, and scans content. Harbor extends the open source Docker Distribution by adding the functionalities usually required by users such as security, identity and management.
KubeSphere Installer integrates Harbor's Helm Chart (v18.11.1), built-in Harbor as an optional installation item, users can configure the installation according to the project needs, users just need to simply configure it in conf/vars.yml before installation. Follow the steps below to install and access the Harbor.
Modify the Configuration
- Before installing KubeSphere, set
Harbor_enable: trueinconf/vars.yml.
# harbor deployment
Harbor_enable: true
Harbor_domain: harbor.devops.kubesphere.local- Save it after modification, and then execute the installation script, finally you can install Harbor through Helm Chart.
Visit Harbor
To add Harbor as a image registry in KubeSphere, please refer to the following steps to configure Docker access and then add the user authentication information of Harbor in KubeSphere.
Login with Docker
Step 1: Modify the Docker Configuration
Modify the Docker Configuration for all nodes in the cluster firstly, that is, add the field --insecure-registry=harbor.devops.kubesphere.local:30280 into /etc/systemd/system/docker.service.d/docker-options.conf as following:
Configuration Example
[Service]
Environment="DOCKER_OPTS=  --registry-mirror=https://registry.docker-cn.com --data-root=/var/lib/docker --log-opt max-size=10m --log-opt max-file=3  --insecure-registry=harbor.devops.kubesphere.local:30280"
Note: The "Environment" field should be written on one line and cannot be manually wrapped.
Step 2: Modify the hosts
You need to add a record as follows in the local /etc/hosts file:
192.168.0.24 harbor.devops.kubesphere.localNote: 192.168.0.24 is the internal IP of the current host. Please fill in your actual node IP. If you need to expose the Harbor service to users outside the cluster, you need to configure the DNS record (in the DNS server or the user's local hosts file) on the external network, and configure the domain name
harbor.devops.kubesphere.localwith the corresponding external IP address. And forward the node port (30290) and add a firewall rule to ensure that external traffic can pass through the node port.
Step 3: Restart Docker Service
When you've completed the steps above, you need to restart the Docker service of all nodes to make the configuration take effect. For example, you need to execute the following commands in Linux hosts:
$ sudo systemctl daemon-reload$ sudo systemctl restart dockerStep 4: Login Harbor
Execute the following command to log in to the Harbor image registry. Make sure that you can see "Login Succeeded" returning.
$ docker login -u admin -p Harbor12345 http://harbor.devops.kubesphere.local:30280

WARNING! Using --password via the CLI is insecure. Use --password-stdin.
WARNING! Your password will be stored unencrypted in /root/.docker/config.json.
Configure a credential helper to remove this warning. See
https://docs.docker.com/engine/reference/commandline/login/#credentials-store

Login Succeeded
For more tutorials on how to make docker image, pull and upload images, as well as using Dockerfiles, see Docker Documentation.
Add Harbor in KubeSphere
Sign in KubeSphere, enter into one project (e.g. demo-namespace), then select Configuration Center → Secrets.
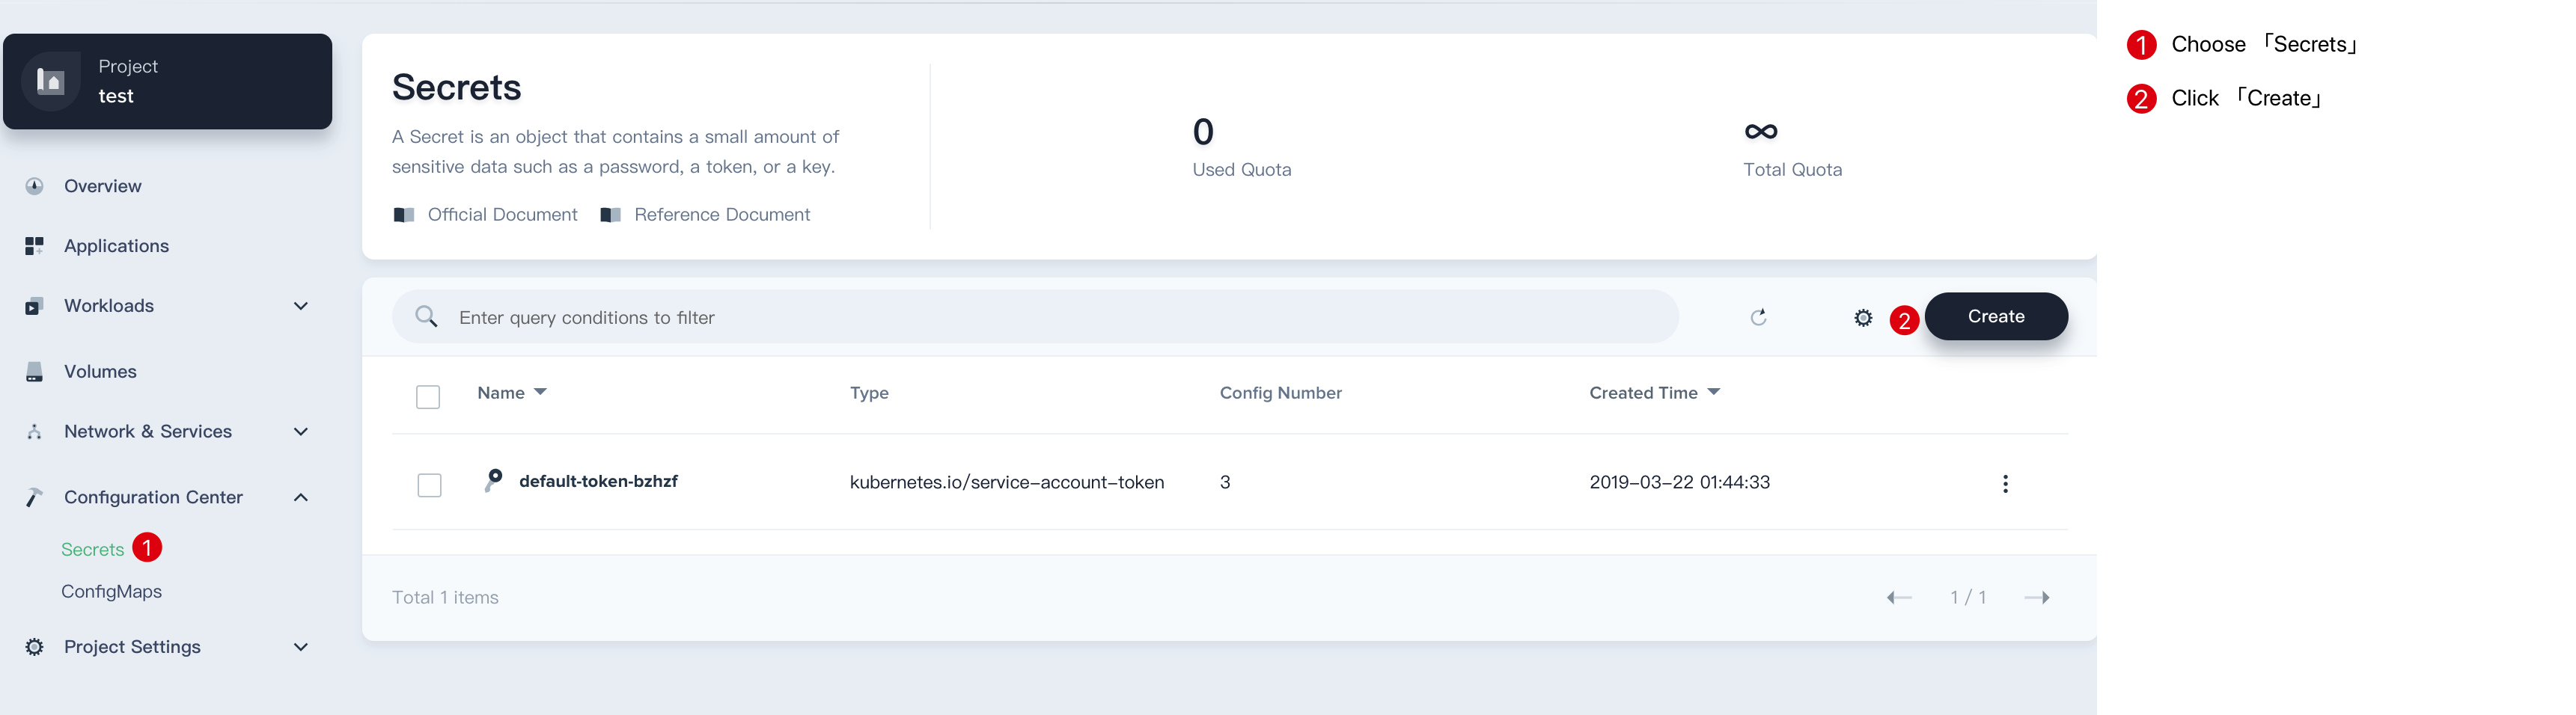
Click Create Secret button, then fill in the basic information and secret settings in the pop-up window.
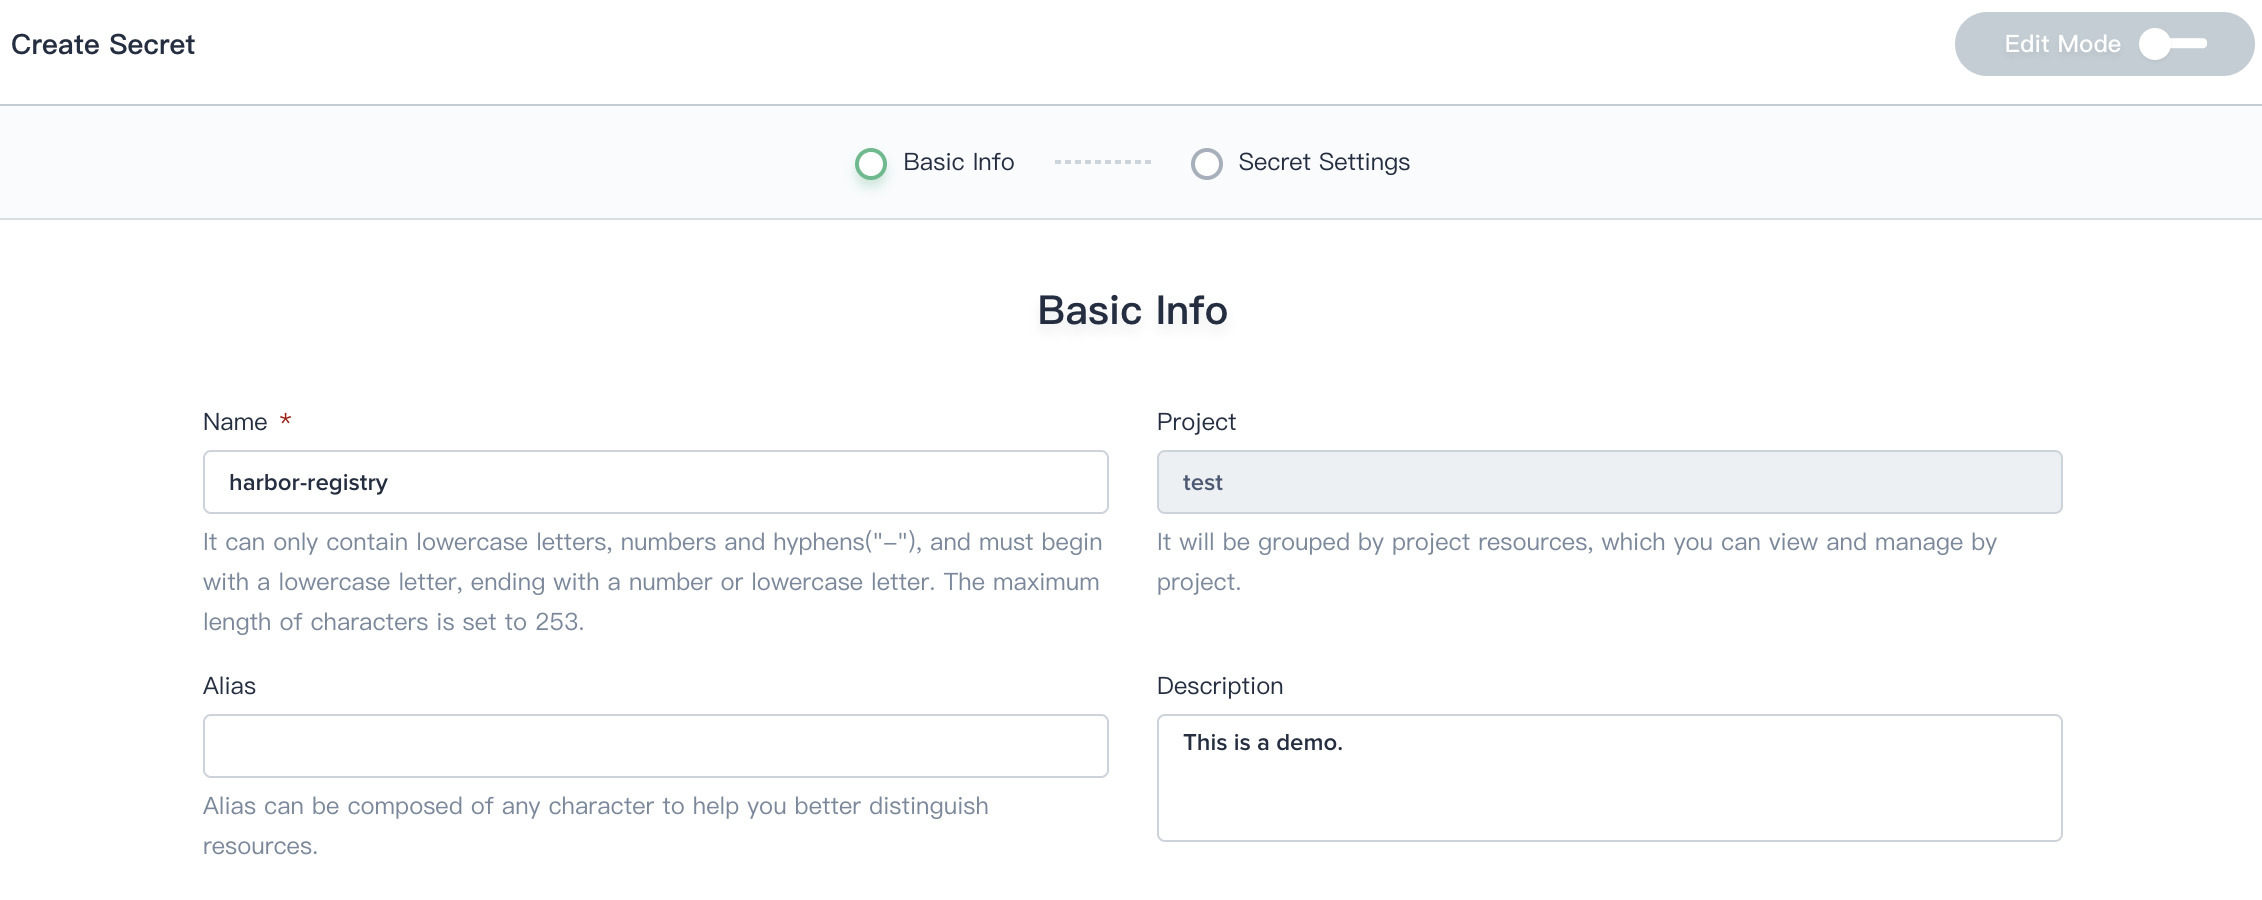
Step 1: Basic information
On the basic information page, enter the name of the registry, you can also fill in the description as your needs.
- Name: A concise and clear name for this registry, which is convenient for users to browse and search, e.g.
harbor-registry. - Alias: Helps you better distinguish resources and supports Chinese.
- Description: A brief introduction to this registry.
Click Next when you're done.
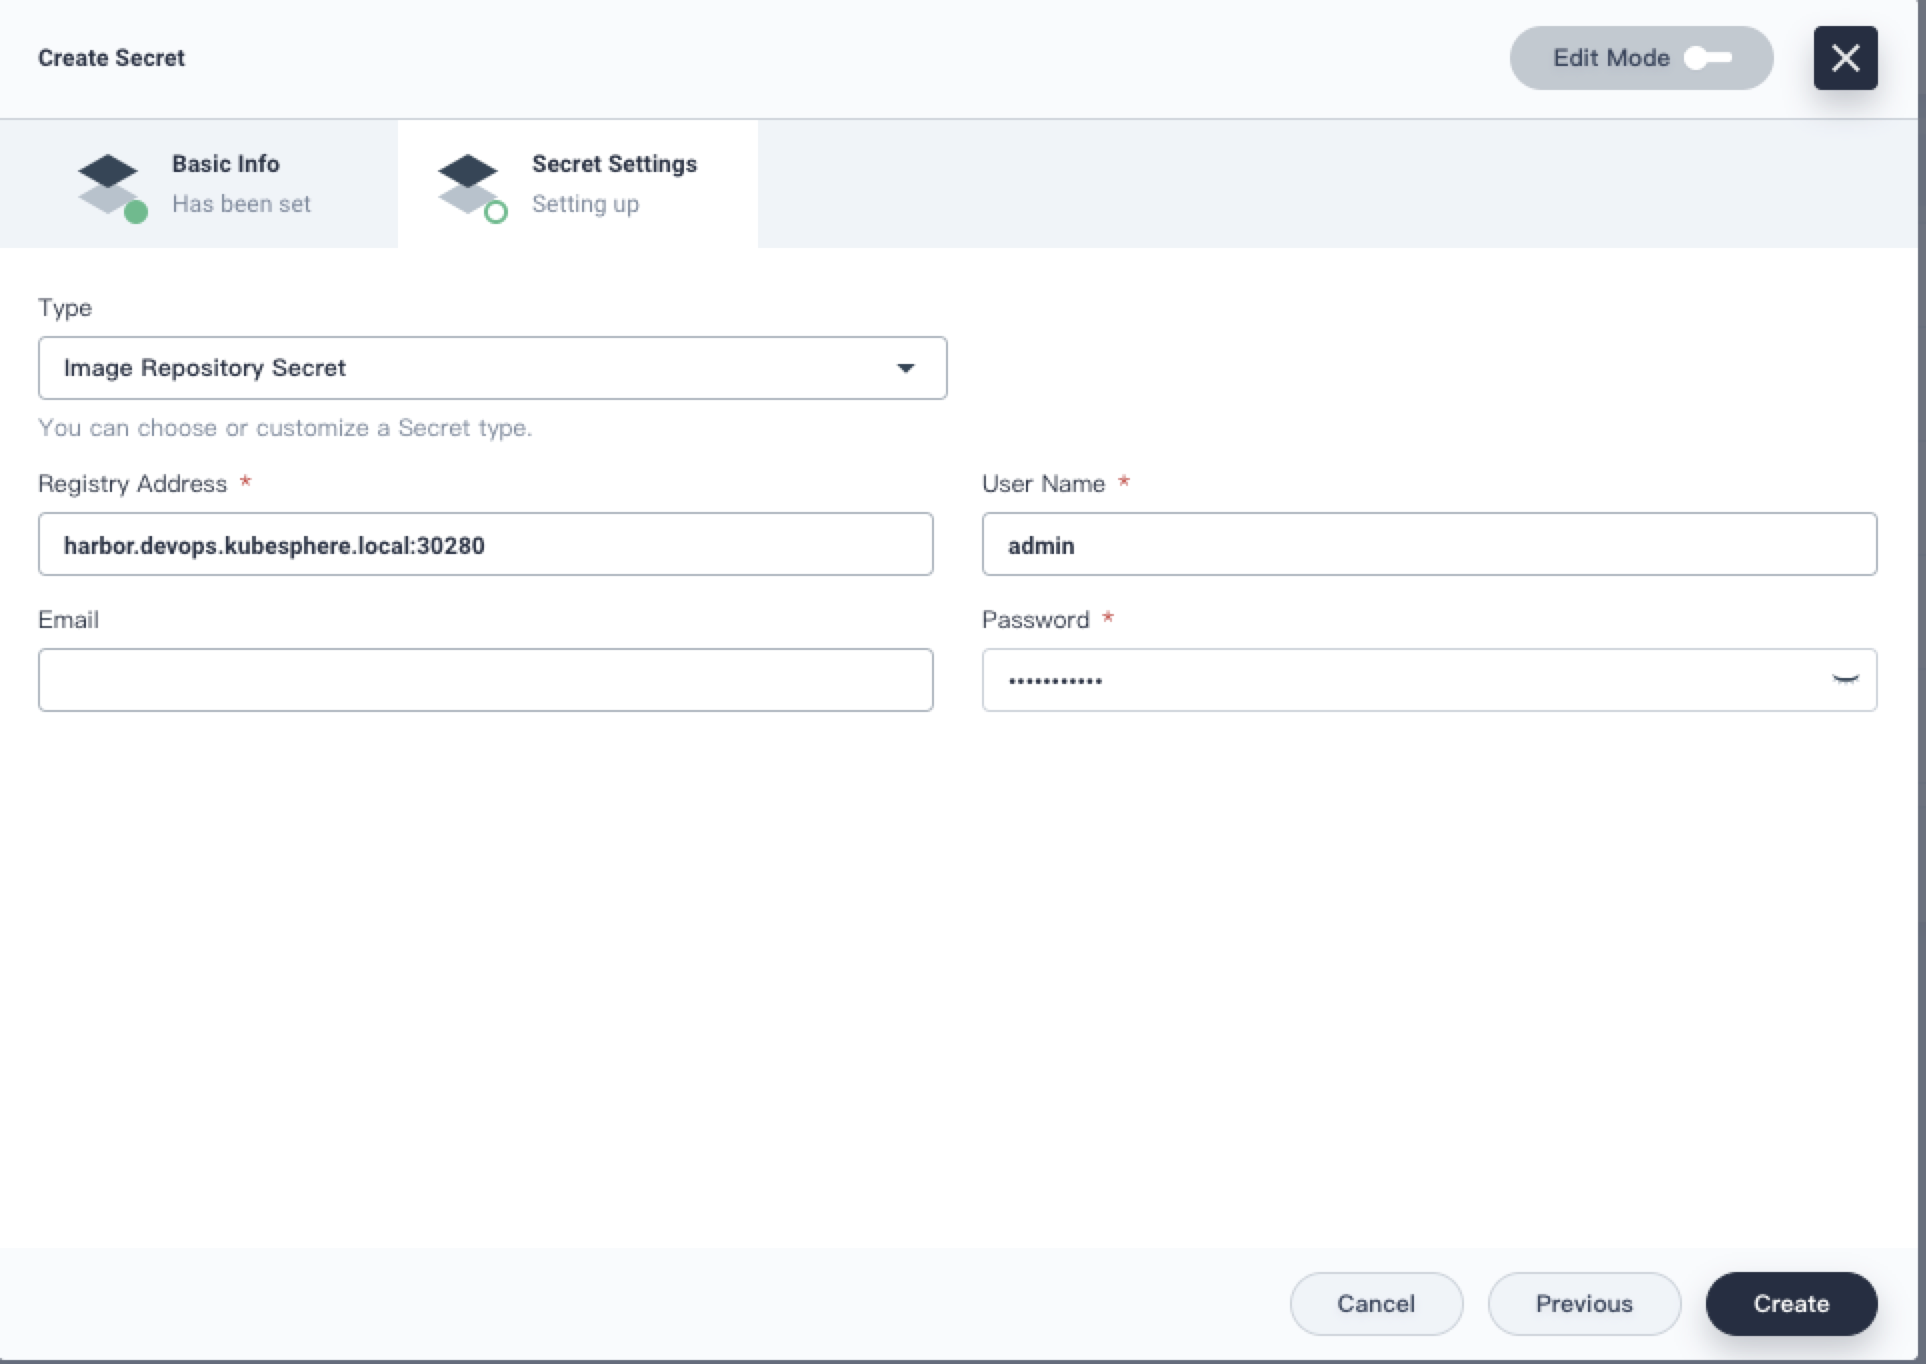
Step 2: Fill in the Harbor Authentication
2.1. Select Image Repositry Secret, refer to the following prompt to fill in the login authentication of the Harbor registry.
- Registry Address: Enter
harbor.devops.kubesphere.local:30280 - Username: admin
- Password: Harbor12345
- Email: Fill in your personal email address
Click Create when you're done.
2.2. If the Harbor configuration and the authentication information are both correct, then it can be created successfully. Once the Harbor registry has been added, you can upload and pull the image.
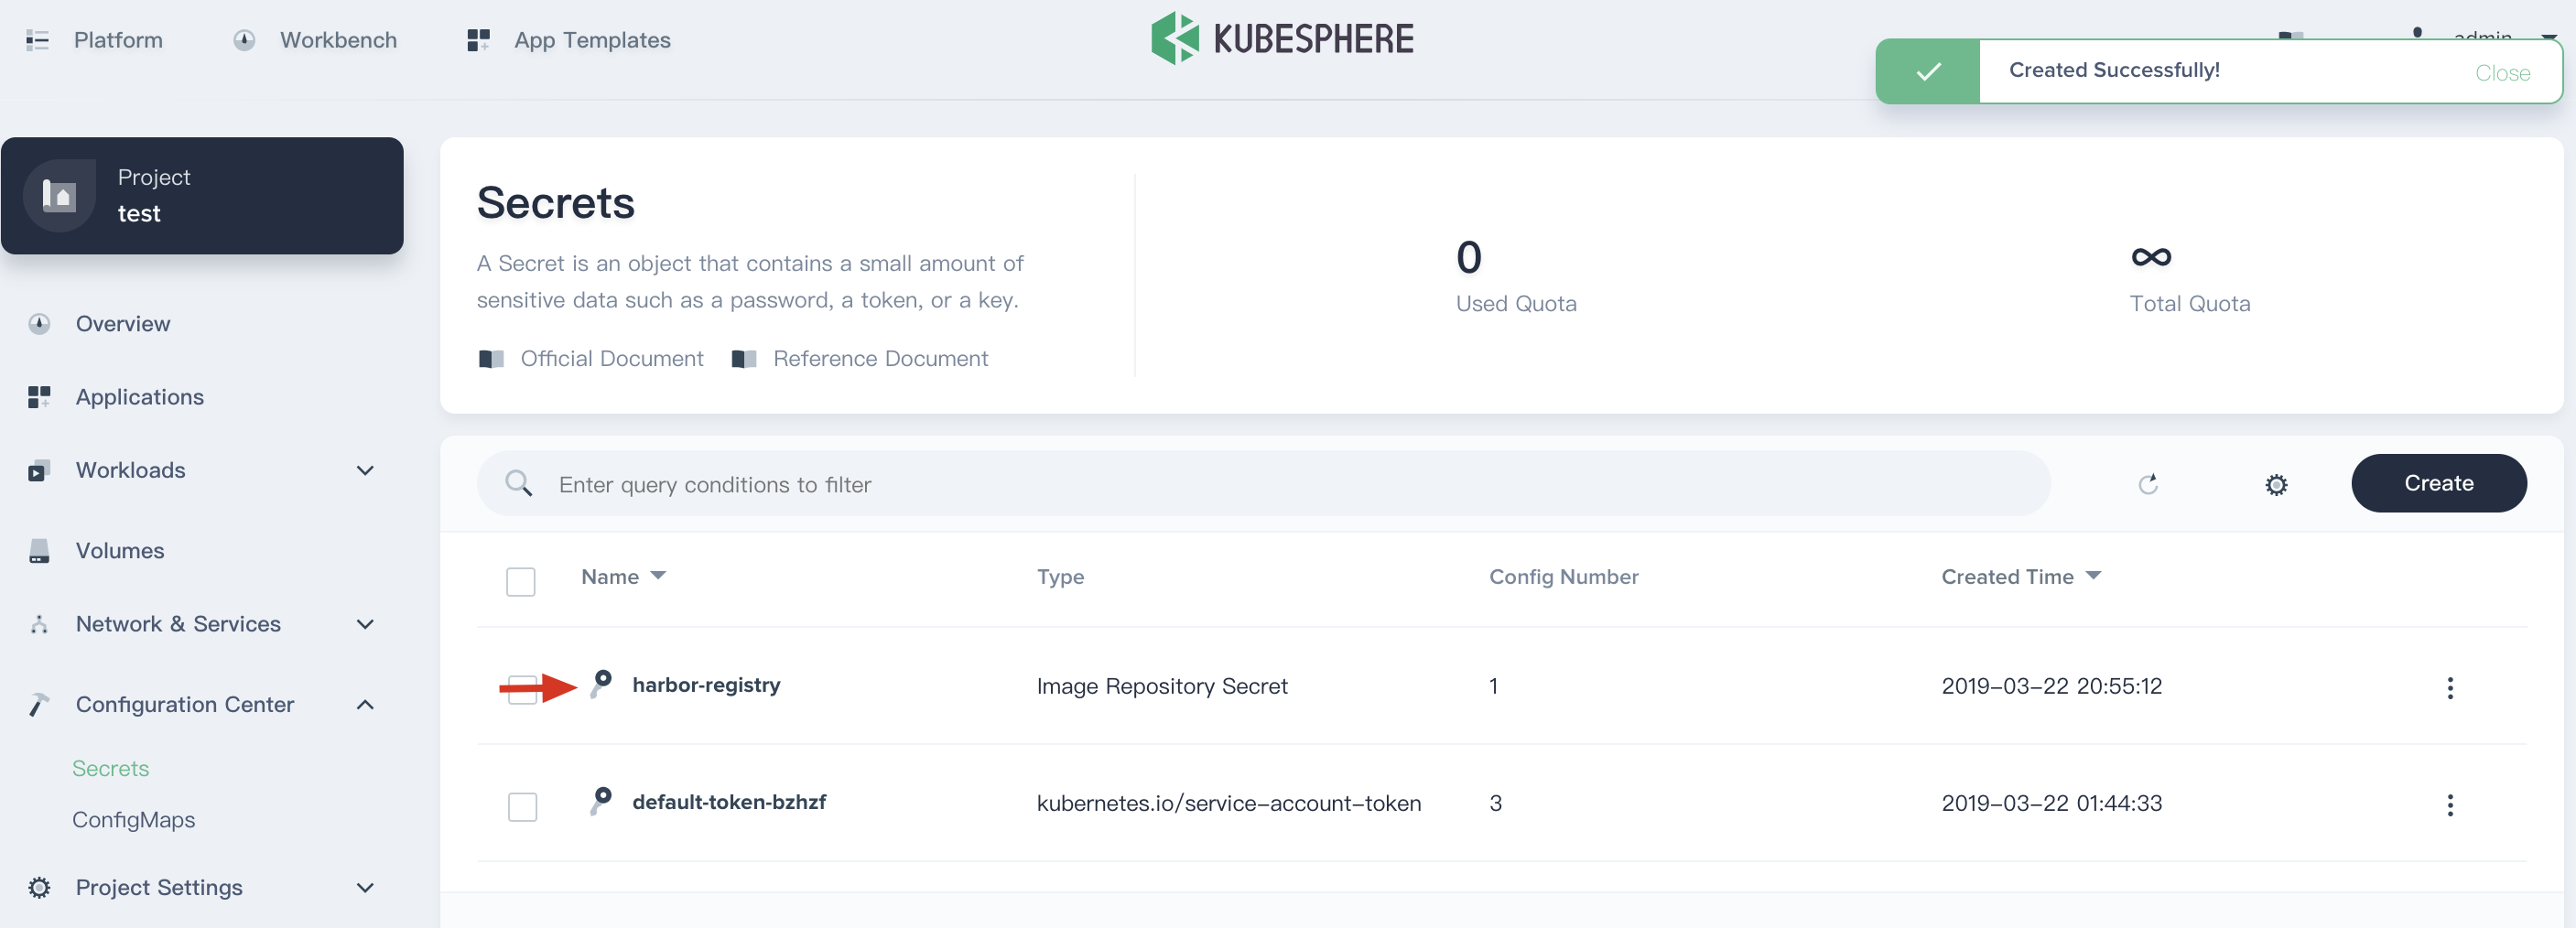
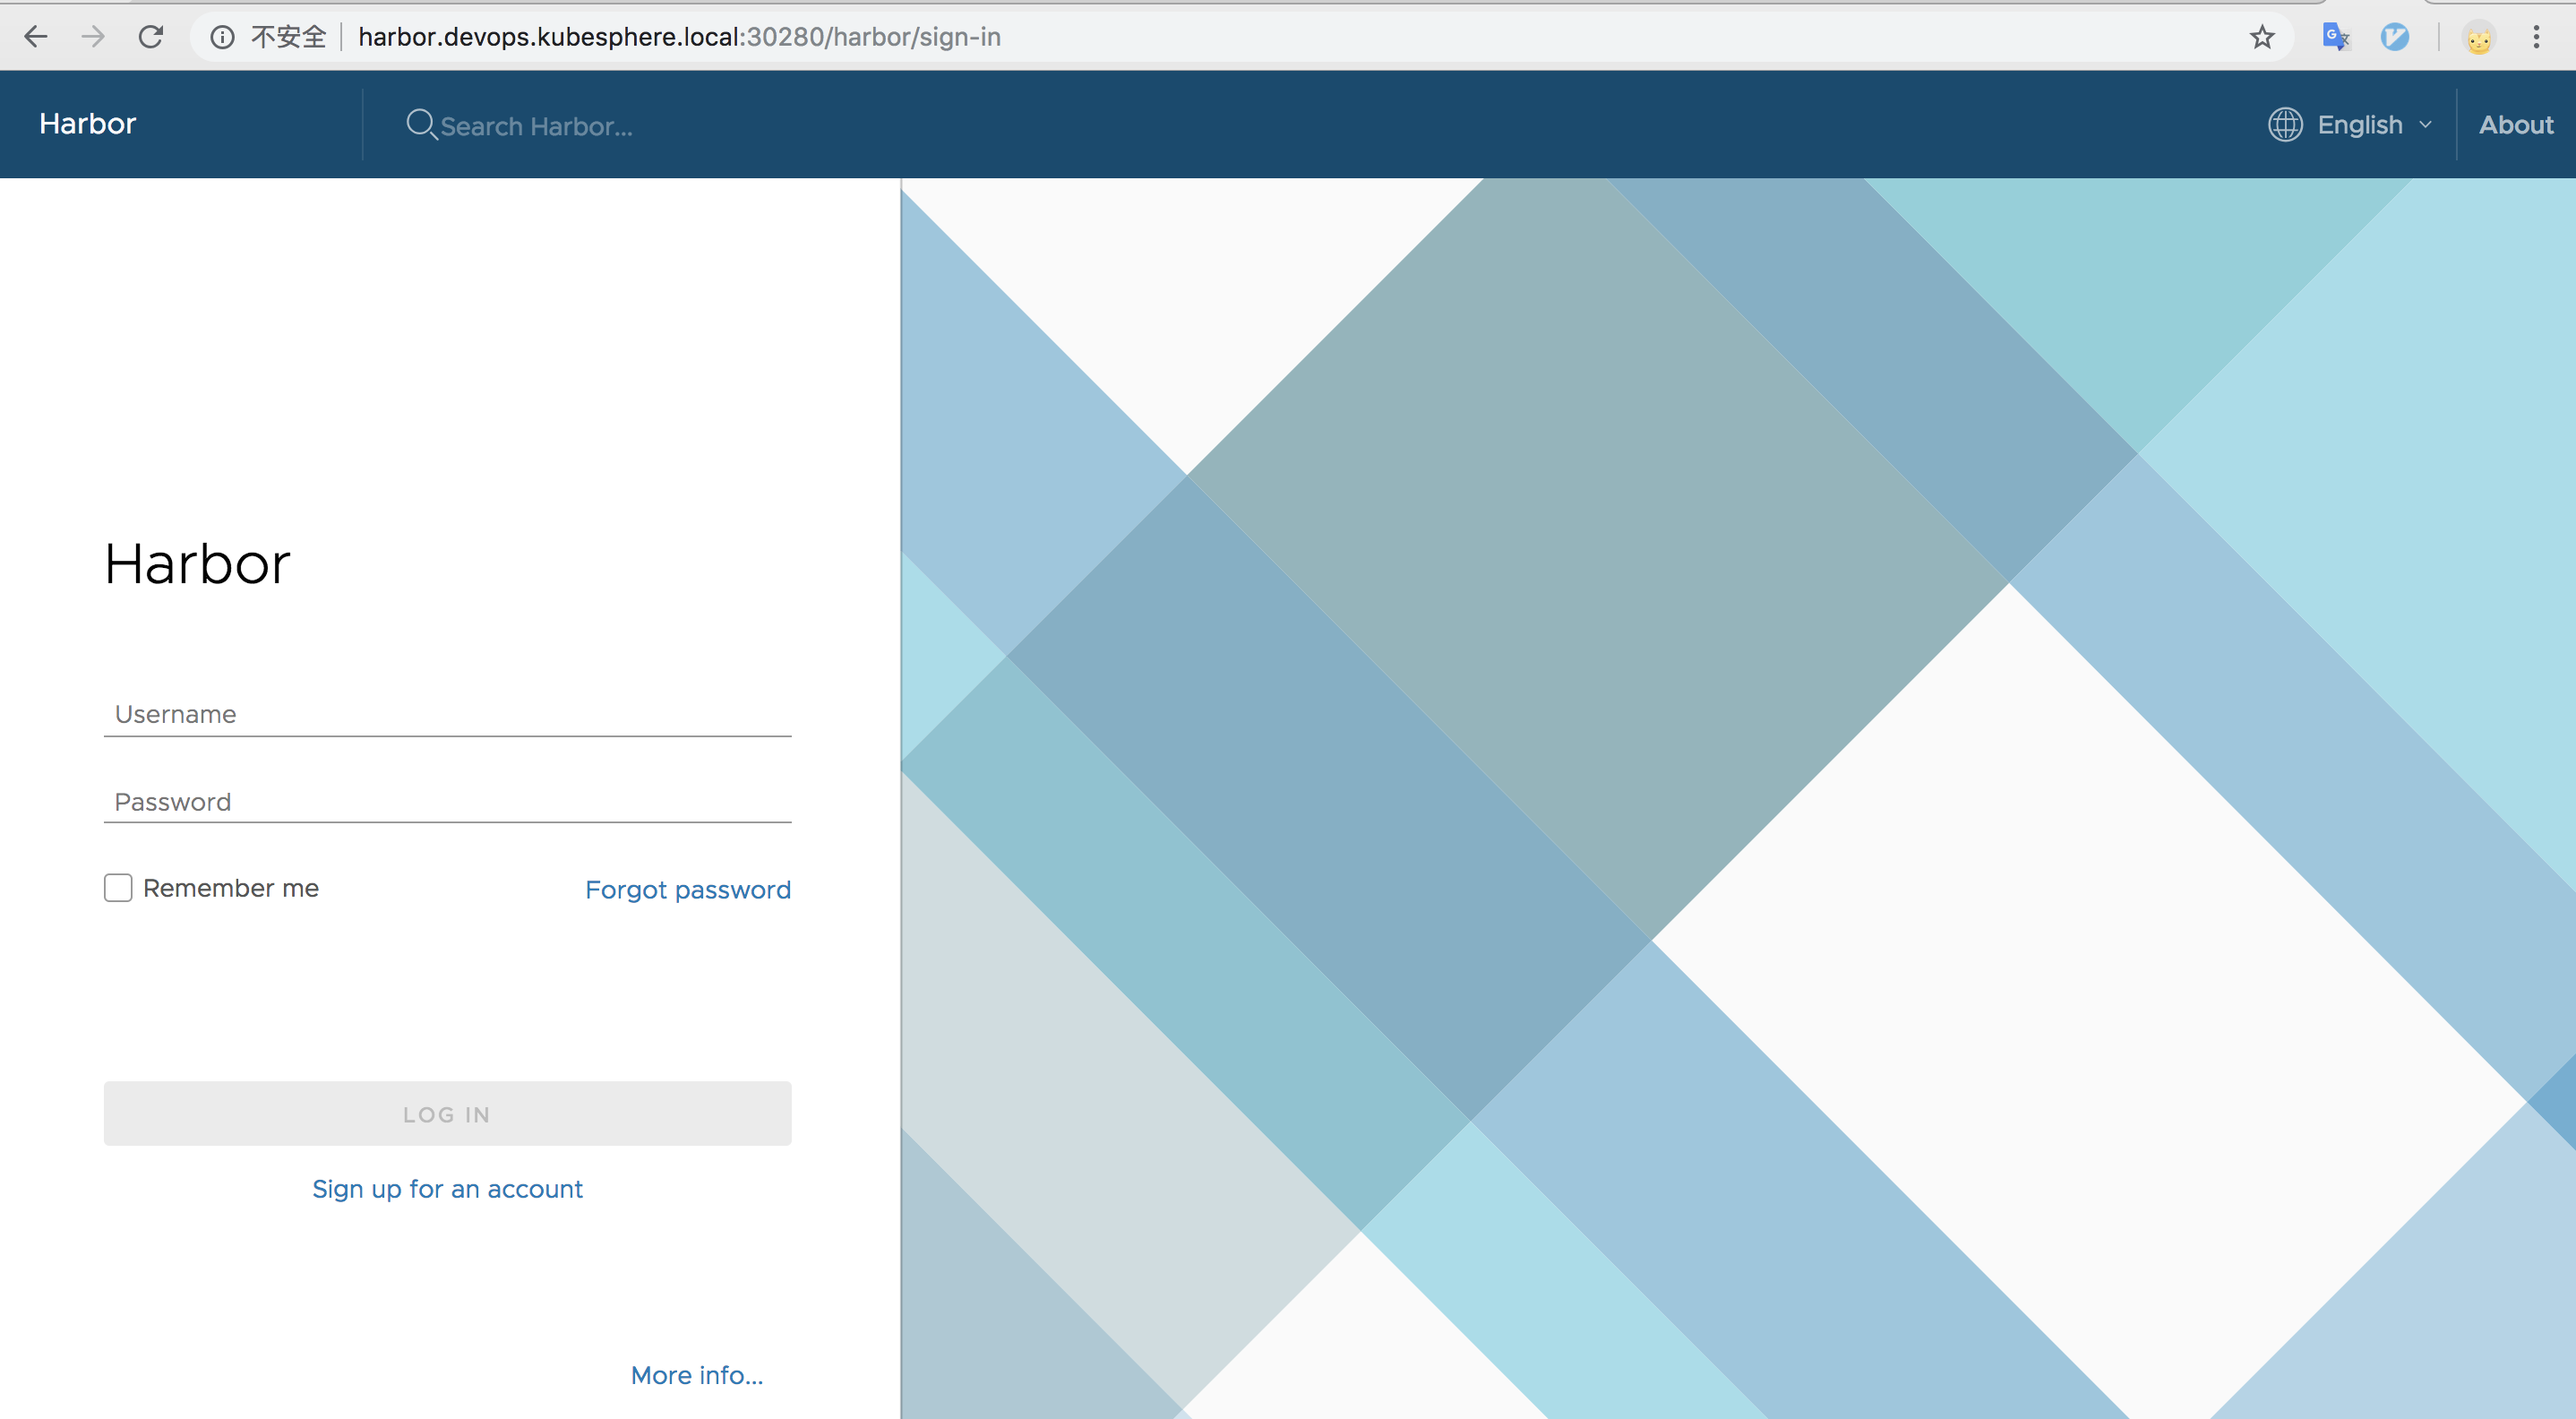
Access the Harbor UI
After KubeSphere is successfully installed, if you need to access Harbor outside the cluster, add a line of record to your local /etc/hosts by referring to the following example, and then you can access the Harbor UI in your browser.
139.198.10.10 harbor.devops.kubesphere.localNote:
139.198.10.10is the EIP of the KubeSphere cluster. Please fill in according to your actual EIP. Make sure you have already bound the EIP to your cluster and configured port forwarding. If the EIP has a firewall, add corresponding rule of the node port (30280) to the rule, ensure that the external network traffic can pass through that node port.
The node port 30280 will be exposed by the Harbor service, currently supports only the http protocol, which can be accessed in the browser using {$domain name}:{$NodePort}, e.g. http://harbor.devops.kubesphere.local:30280
The default administrator username and password is admin / Harbor12345, and other users are consistent with KubeSphere's user account system (Support LDAP). See Harbor Documentation for more details.
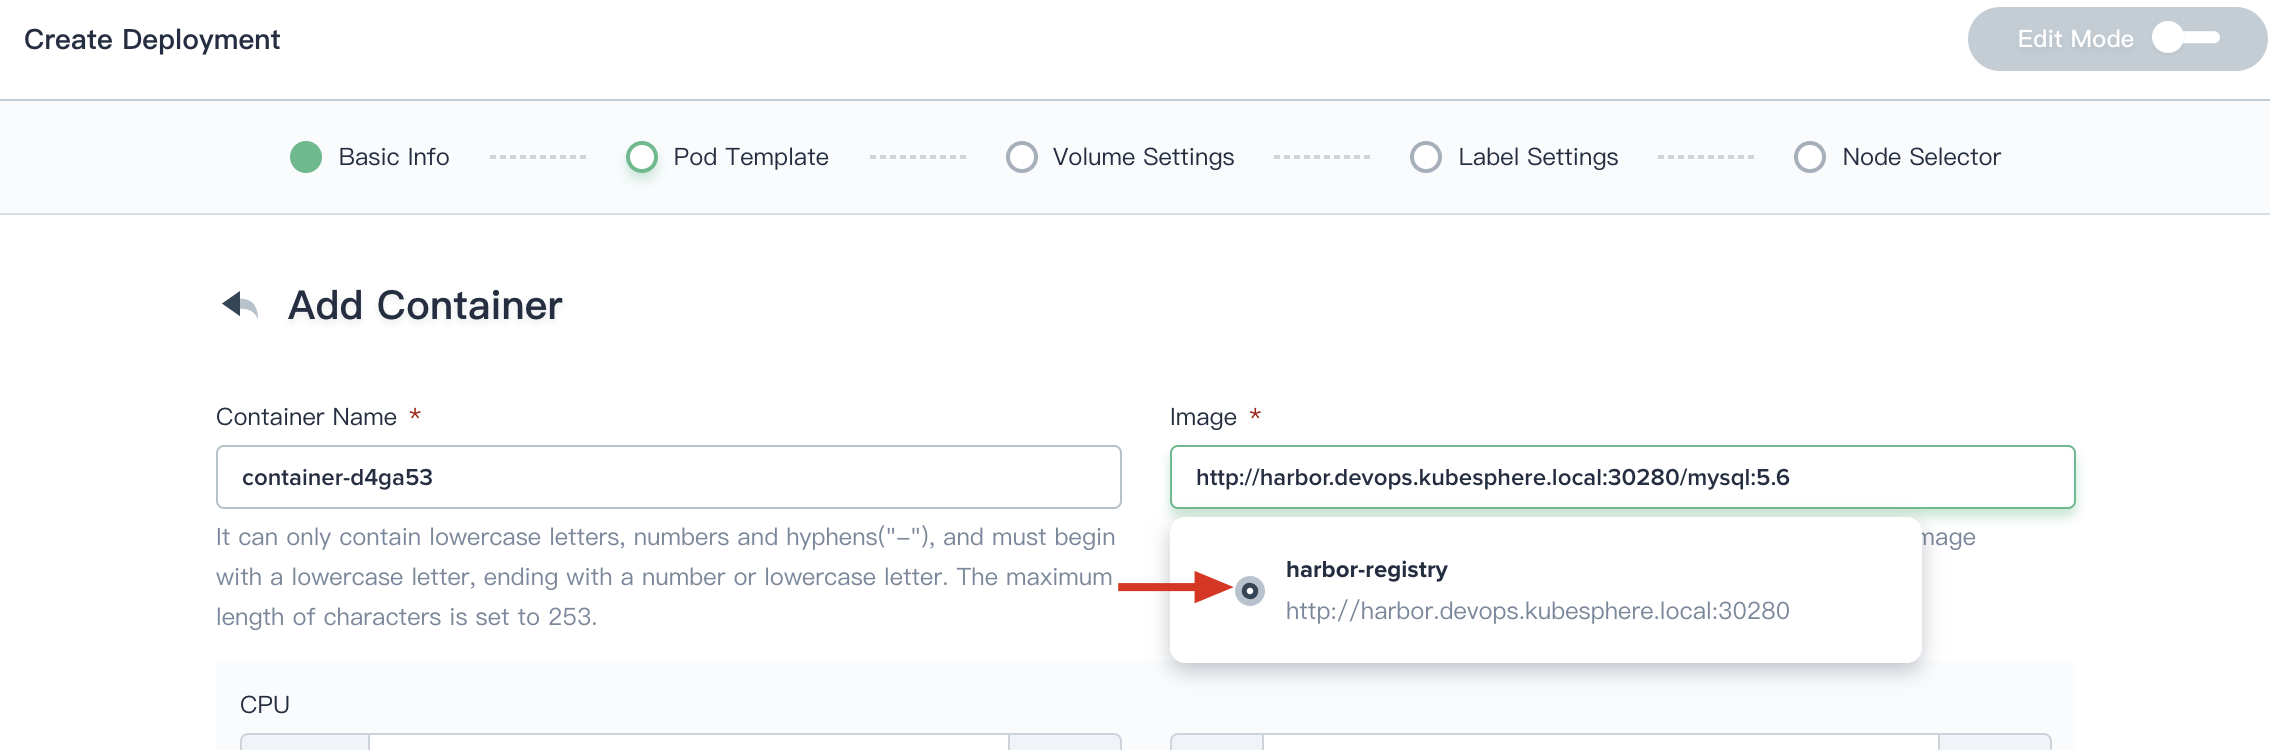
Using Harbor Registry
If you need to use the image in the Harbor in KubeSphere, you need to first build the relevant image and push it to Harbor registry. See the Harbor Documentation for more tutorials.
Take the creation of a deployment as an example of how to pull images from Harbor registry. For example, there is a docker image of mysql:5.6 in the Harbor. In the Pod template table, you need to select the image registry first, and then enter http://harbor.devops.kubesphere.local:30280/mysql:5.6 as image, commonly the format is Image registry address/image name:tag. Once the deployment created, which means that that image in the Harbor is available to pull and use.