Installation
Intruction
Install on Linux
Install on Kubernetes
Related Tools
Cluster Operation
Quick Start
Cluster Admin Guide
Multi-tenant Management
Platform Management
Infrastructure
Monitoring Center
User Guide
Storage
Configuration Center
Project Settings
Development Guide
API Documentation
Credentials Management
A DevOps project user can configure credentials in the application for dedicated use by Jenkins Pipeline. Once a user (e.g. Owner and Maintainer) adds/configures these credentials in DevOps project, the credentials can be used by DevOps projects to interact with these 3rd party applications.
Currently, it can store the following 4 types of credentials in DevOps project:
- Account credentials: Username and password - which could be handled as separate components or as a colon separated string in the format username:password, such as GitHub, GitLab, Docker Hub, etc.
- SSH Username with private key - an SSH public/private key pair.
- Secret text - which is essentially secret content in a file.
- kubeconfig: It's used to configure cross-cluster authentication, the page will automatically generate the contents of the kubeconfig file of the current Kubernetes cluster. You can also fill
Create a Credential
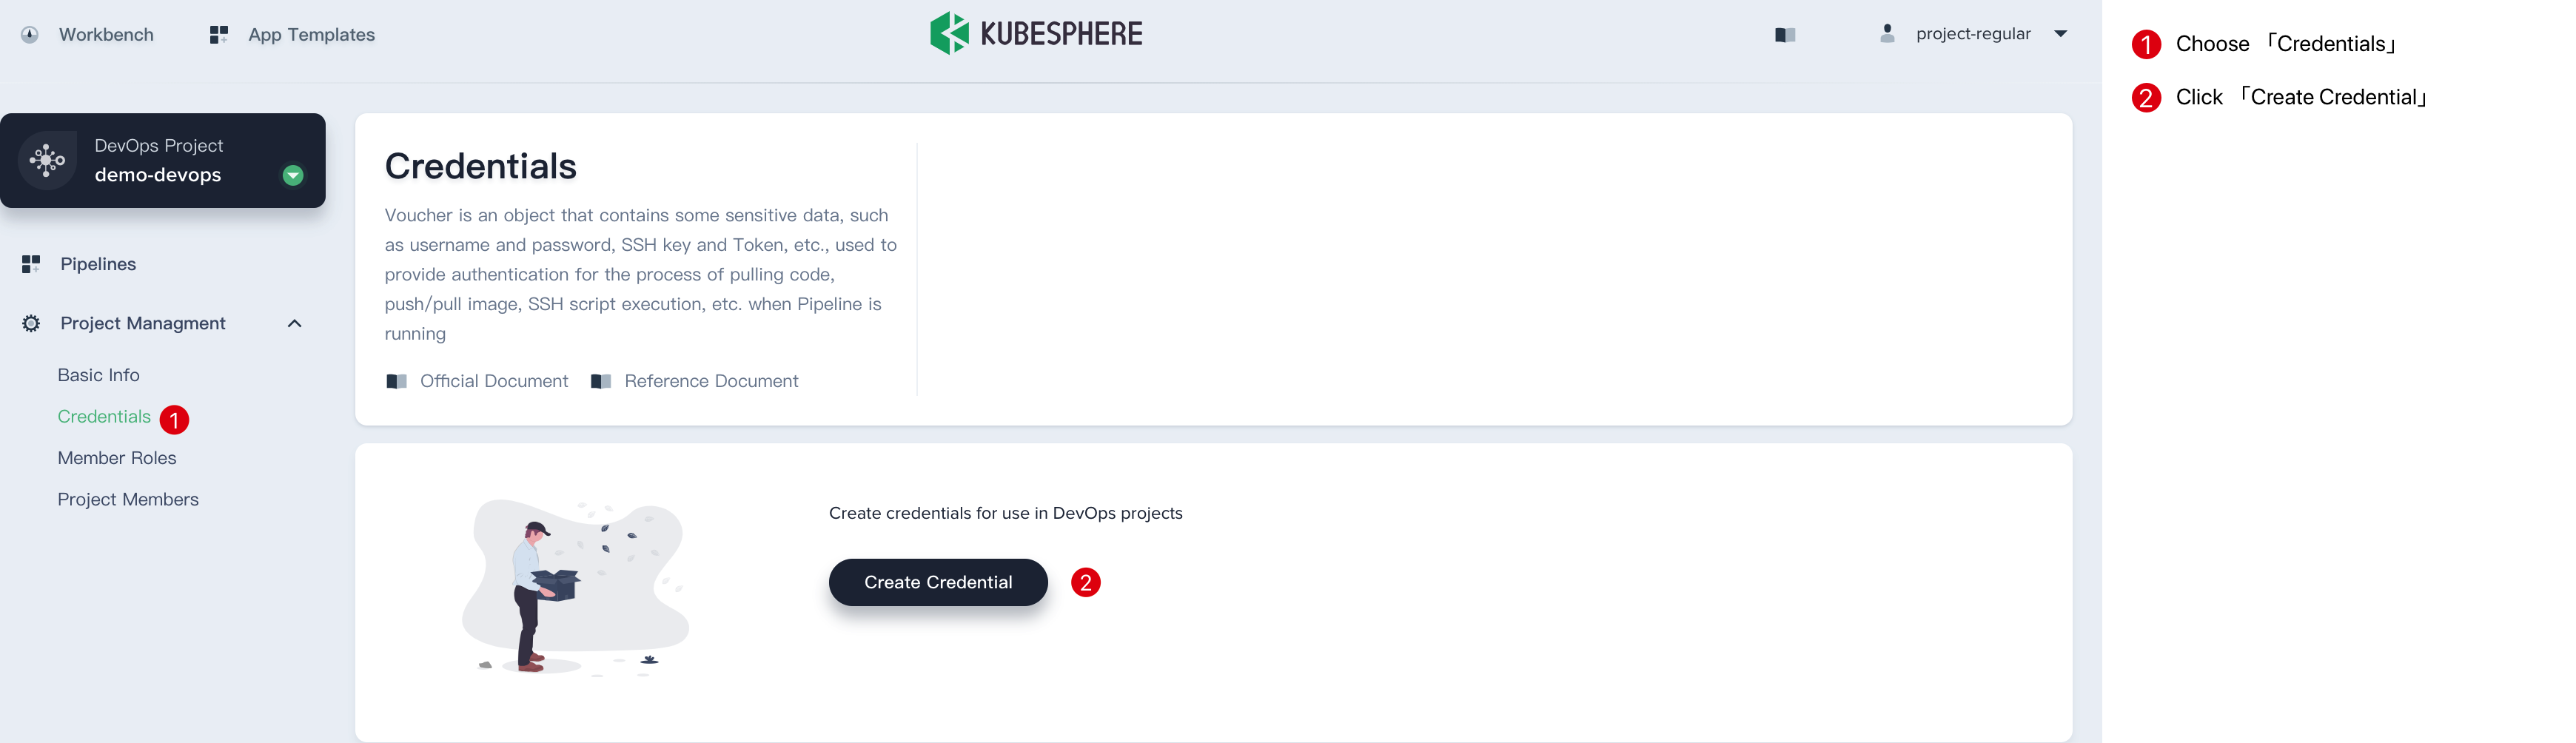
- Sign in with
project-regular, choose Credentials and click Create Credential.
-
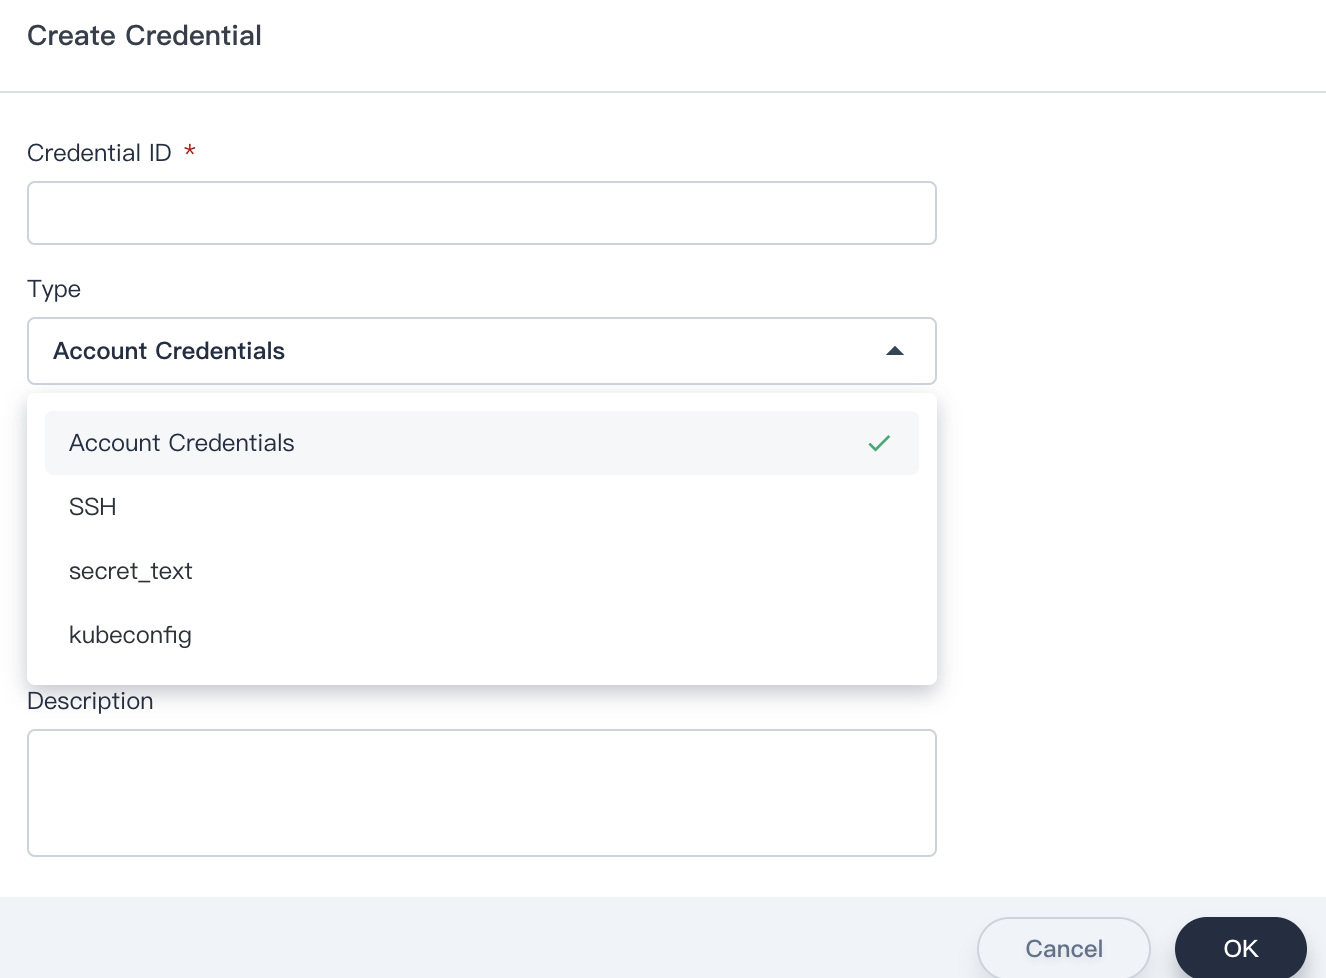
Fill in the basic information in the pop-up window.
-
Credential ID: it will be used in pipeline, e.g. gitlab-id
-
Type: See above introduction.
-
Username: Your personal username for 3rd party application.
-
Token/password: Your personal password for 3rd party application.
-
Description: A brief introduction to this credential.
Click OK when you're done.
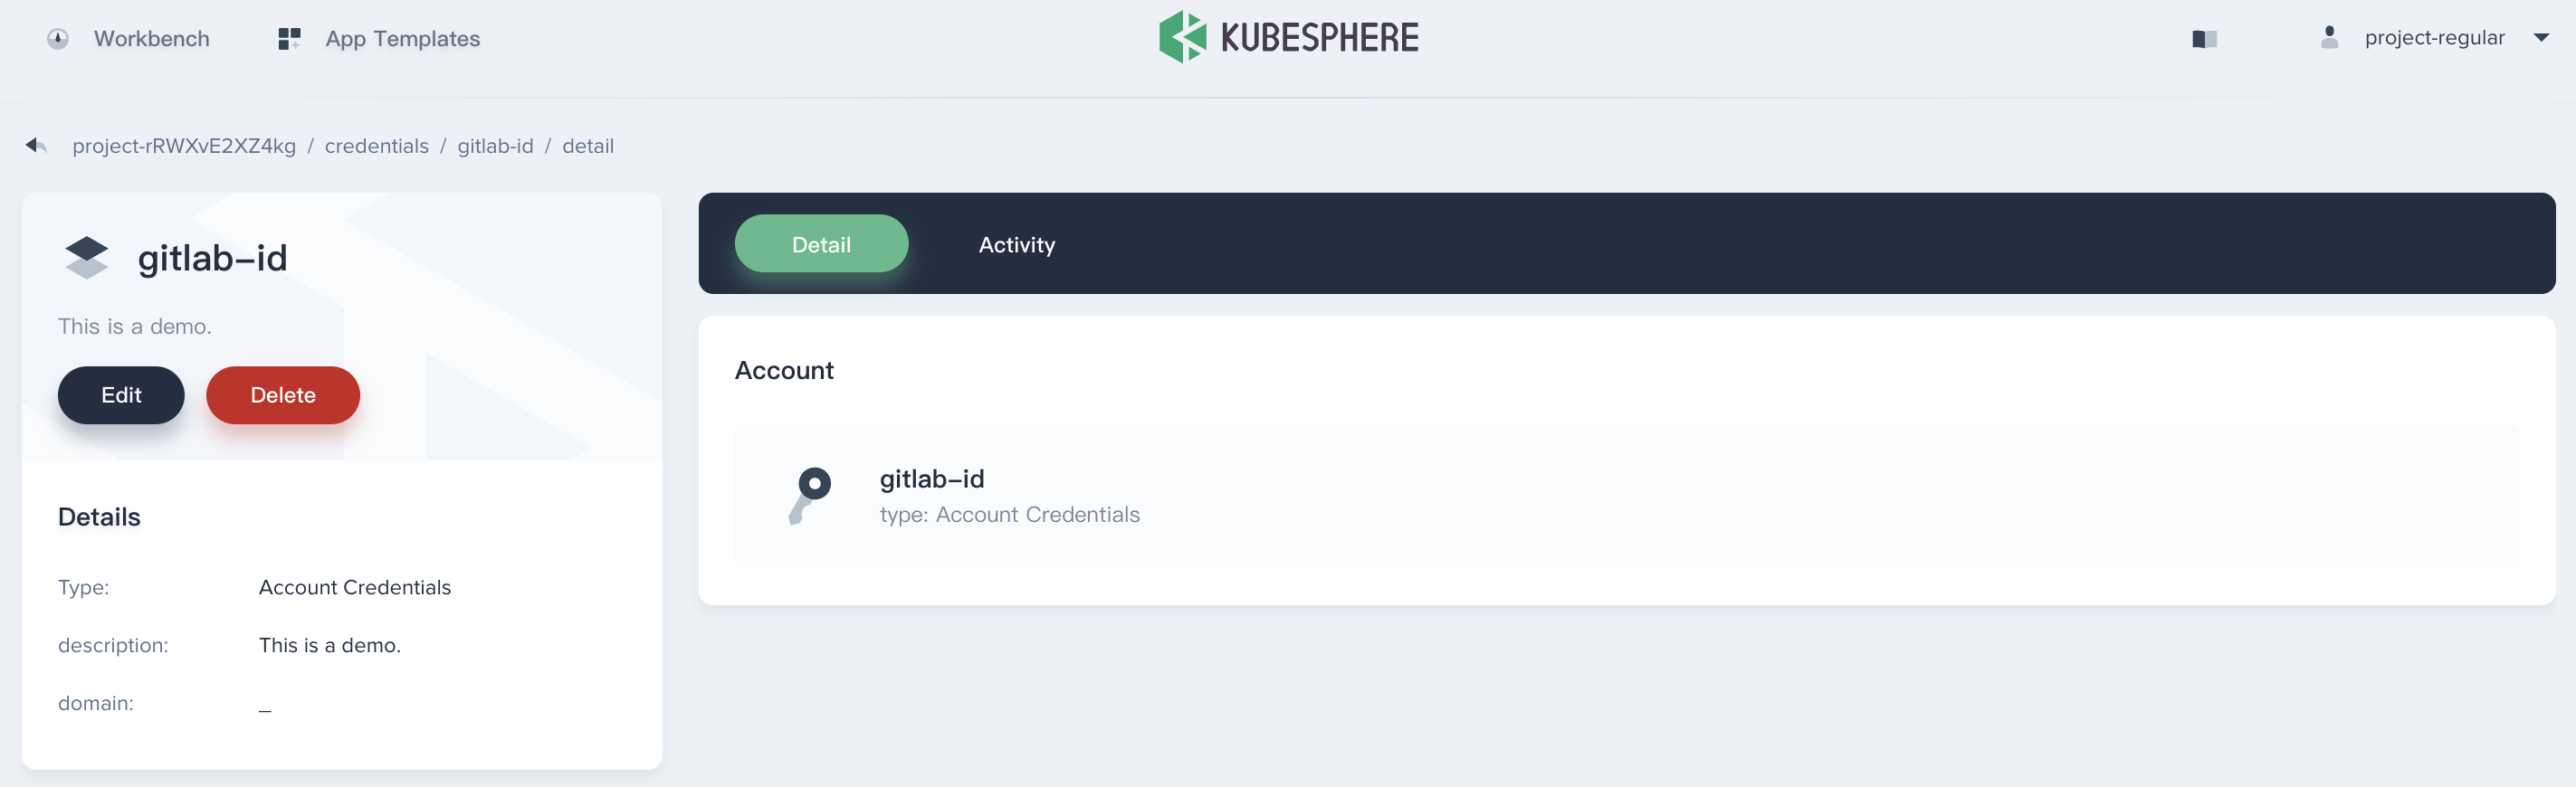
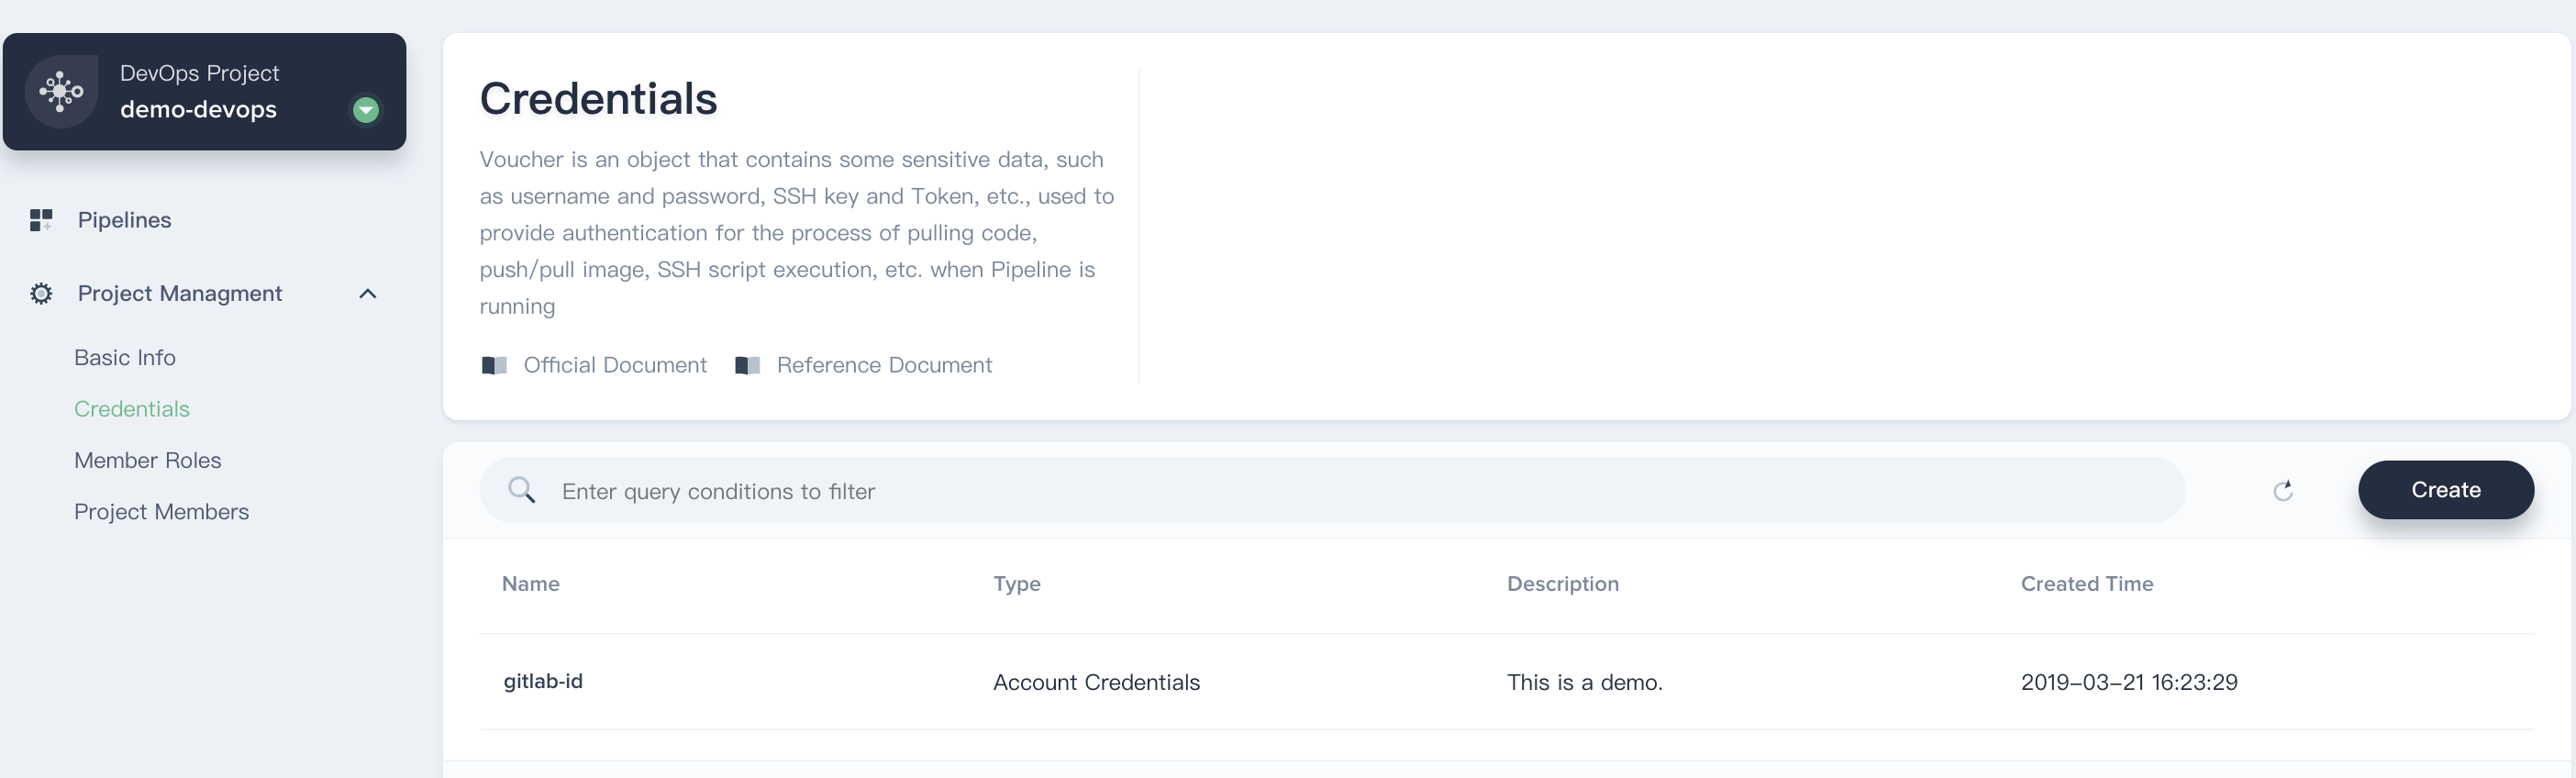
- Then you can see this credential has been created successully.
Using the Credential
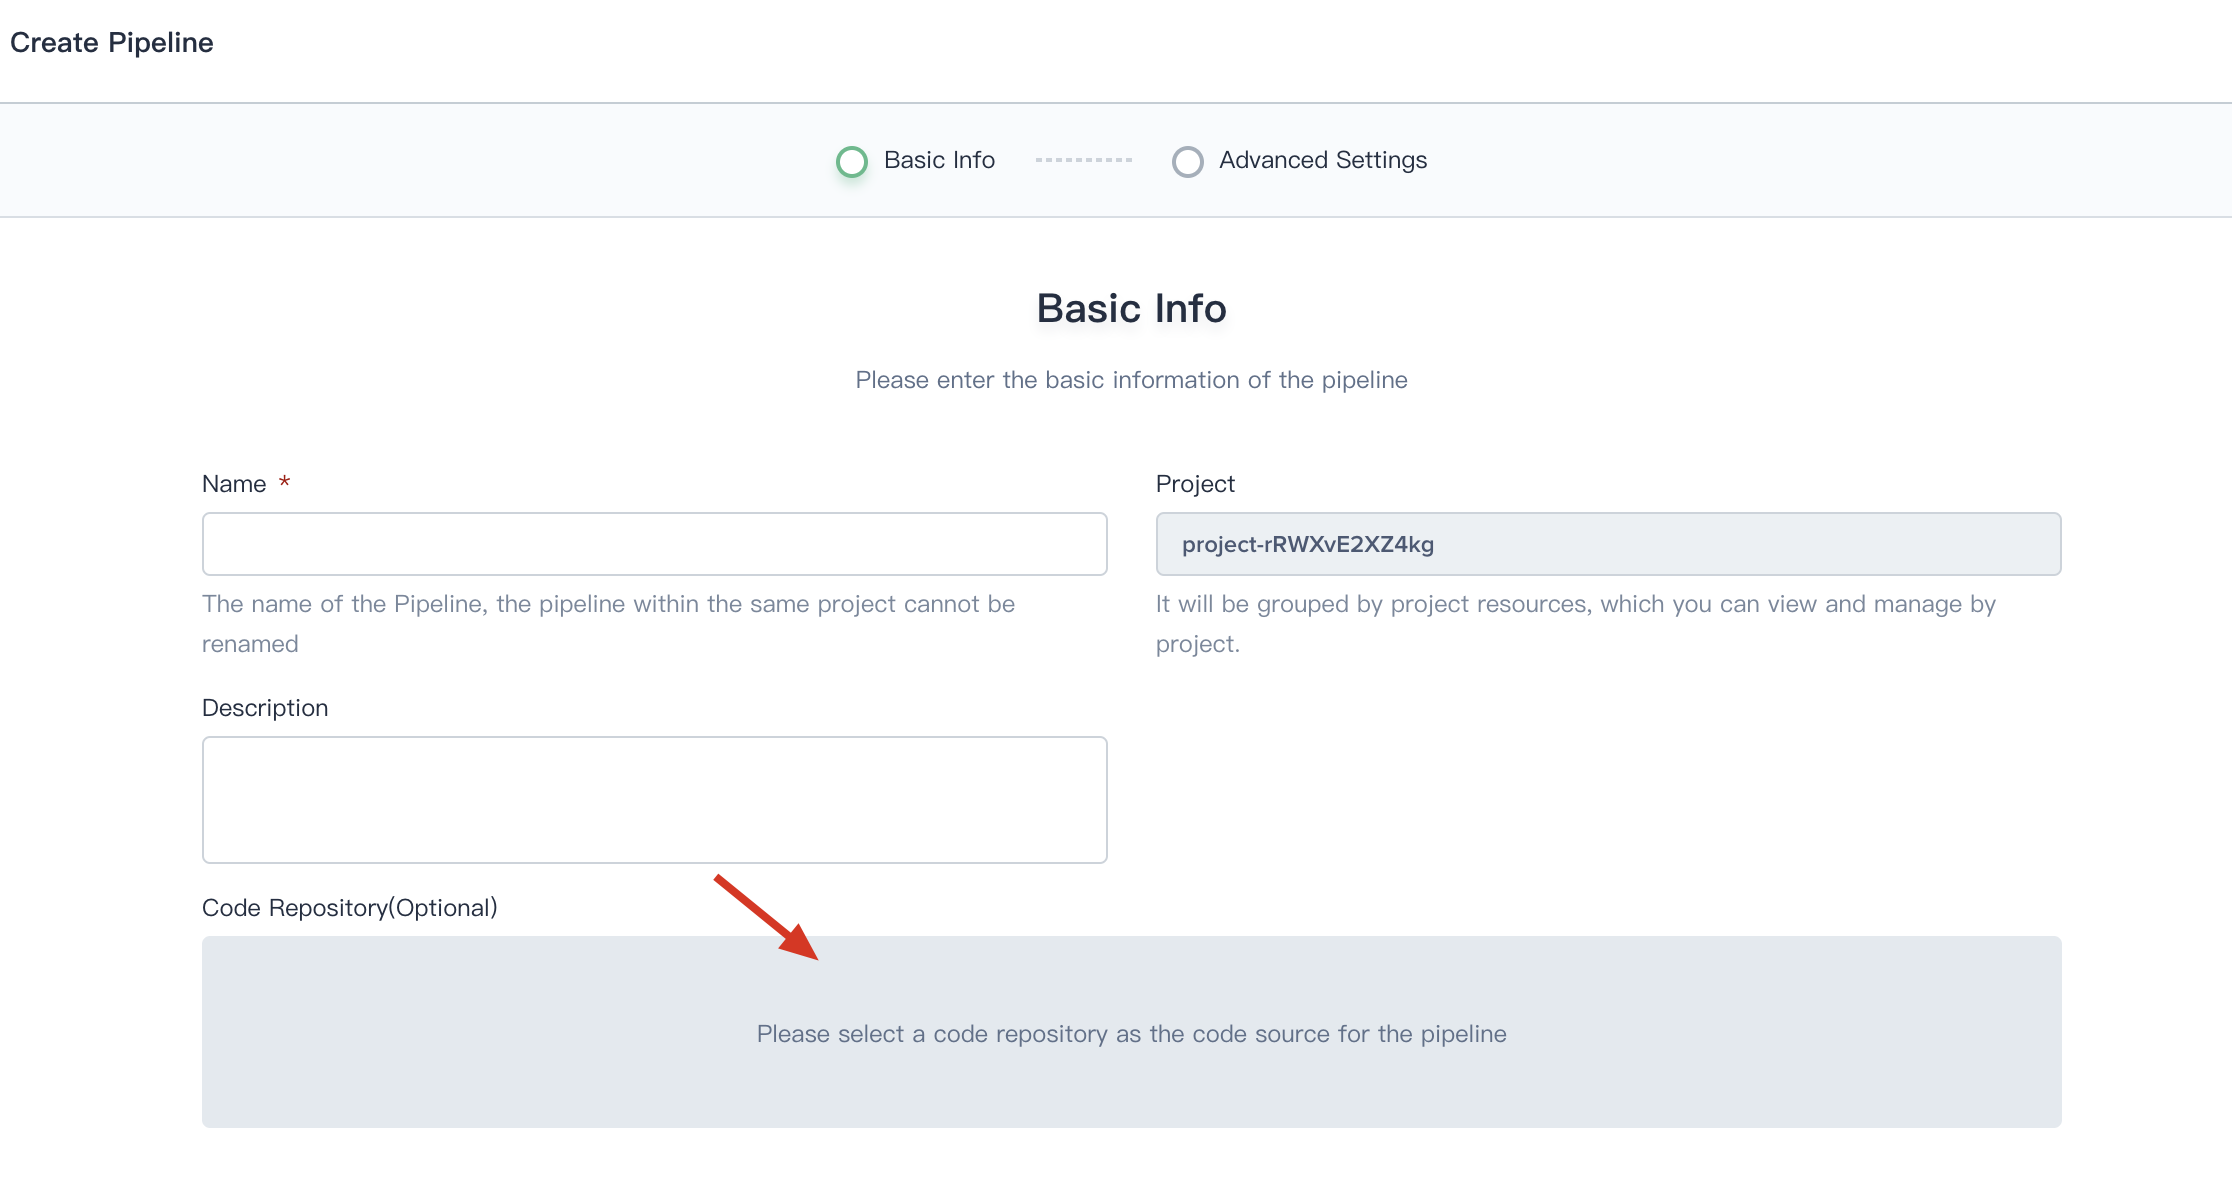
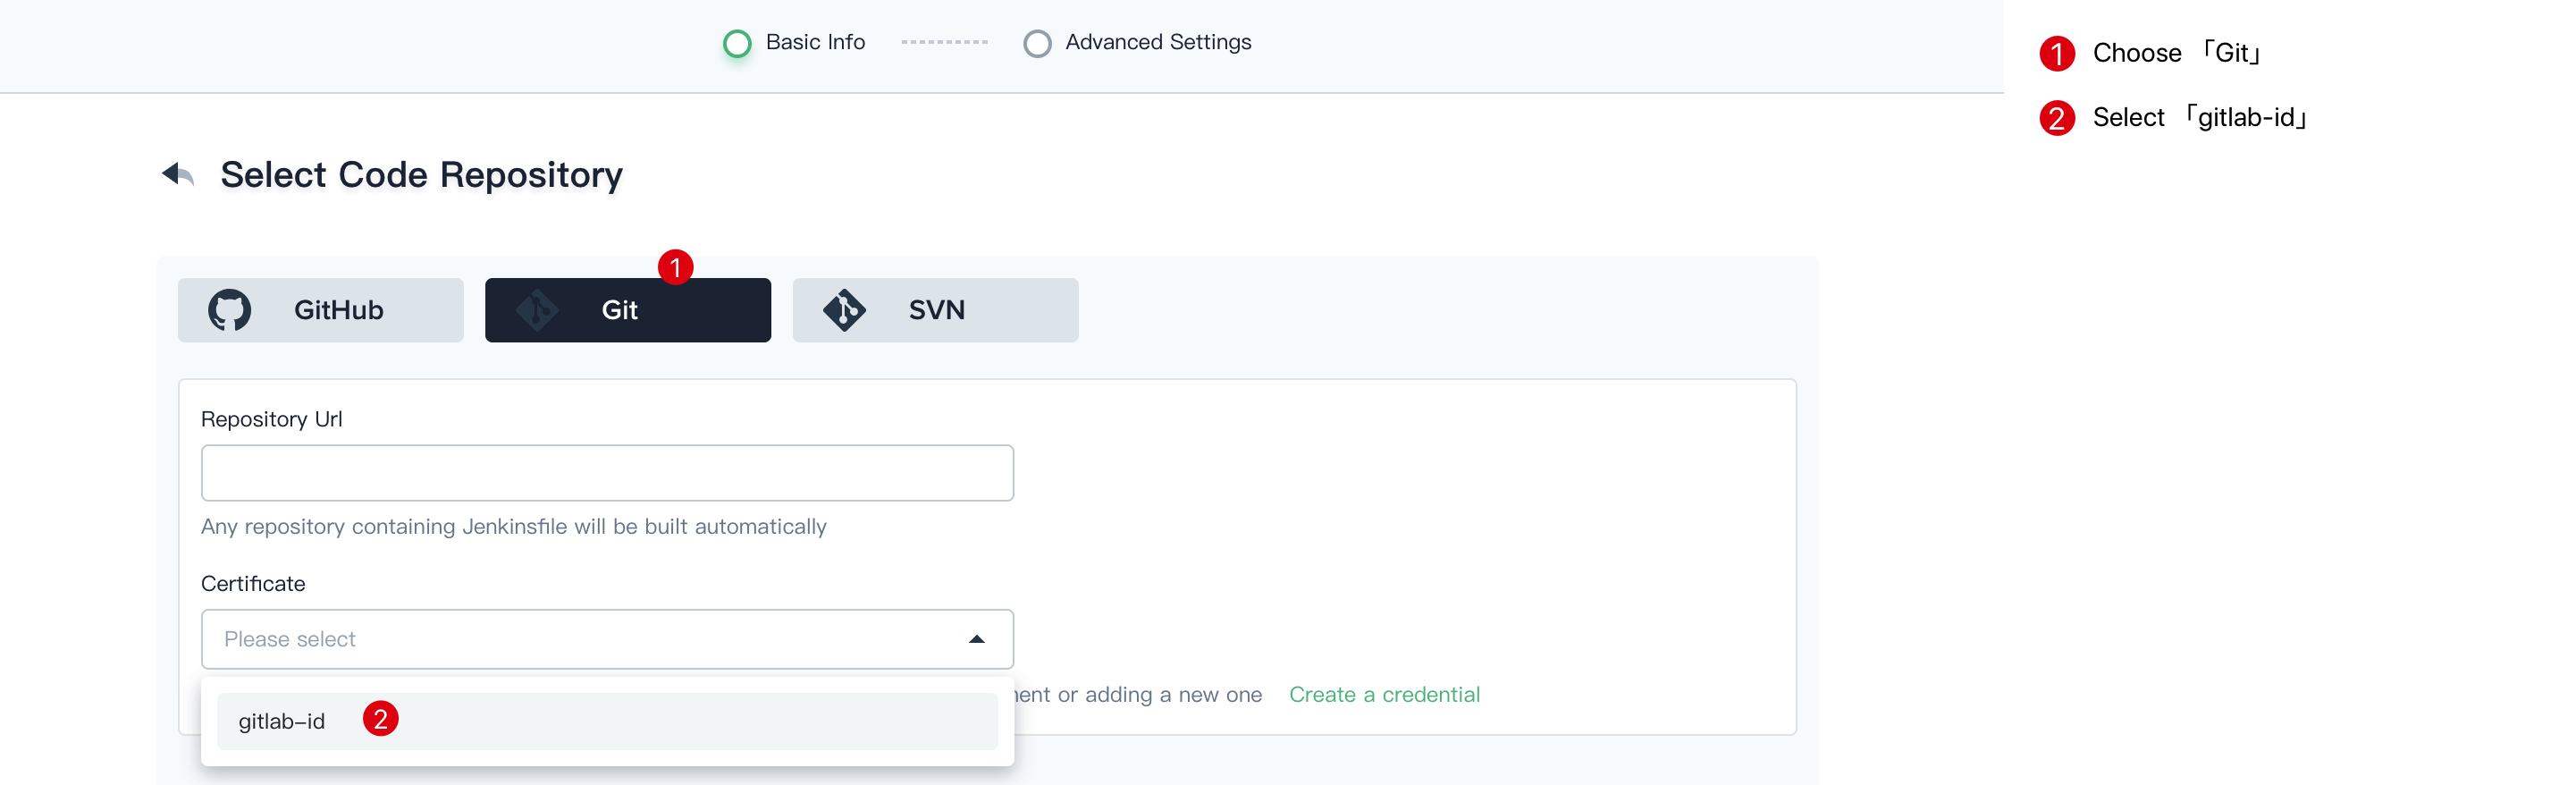
- When you creating a Pipeline, click on Code Repository.
- Choose Git, then select gitlab-id that we created at the last step. Thus you can use it directly.
Manage the Credential
Click into this credential's details page, then you can edit its information or delete it.