Installation
Intruction
Install on Linux
Install on Kubernetes
Related Tools
Cluster Operation
Quick Start
Cluster Admin Guide
Multi-tenant Management
Platform Management
Infrastructure
Monitoring Center
User Guide
Storage
Configuration Center
Project Settings
Development Guide
API Documentation
StatefulSets
A StatefulSet operates under the same pattern as any other Controller. You define your desired state in a StatefulSet object. StatefulSets are valuable for applications that require one or more of the following.
- Stable, unique network identifiers.
- Stable, persistent storage.
- Ordered, graceful deployment and scaling.
- Ordered, automated rolling updates.
This document just describes the parameters or field meanings that may be used in creating a StatefulSet, for its management please refer to Workload Management. At the same time, Quick Start - Deploy a MySQL Application can also help you quickly understand StatefulSets.
Create a StatefulSet
Sign in with project-regular, enter into one project (e.g. demo-namespace), then select Workload → StatefulSets.
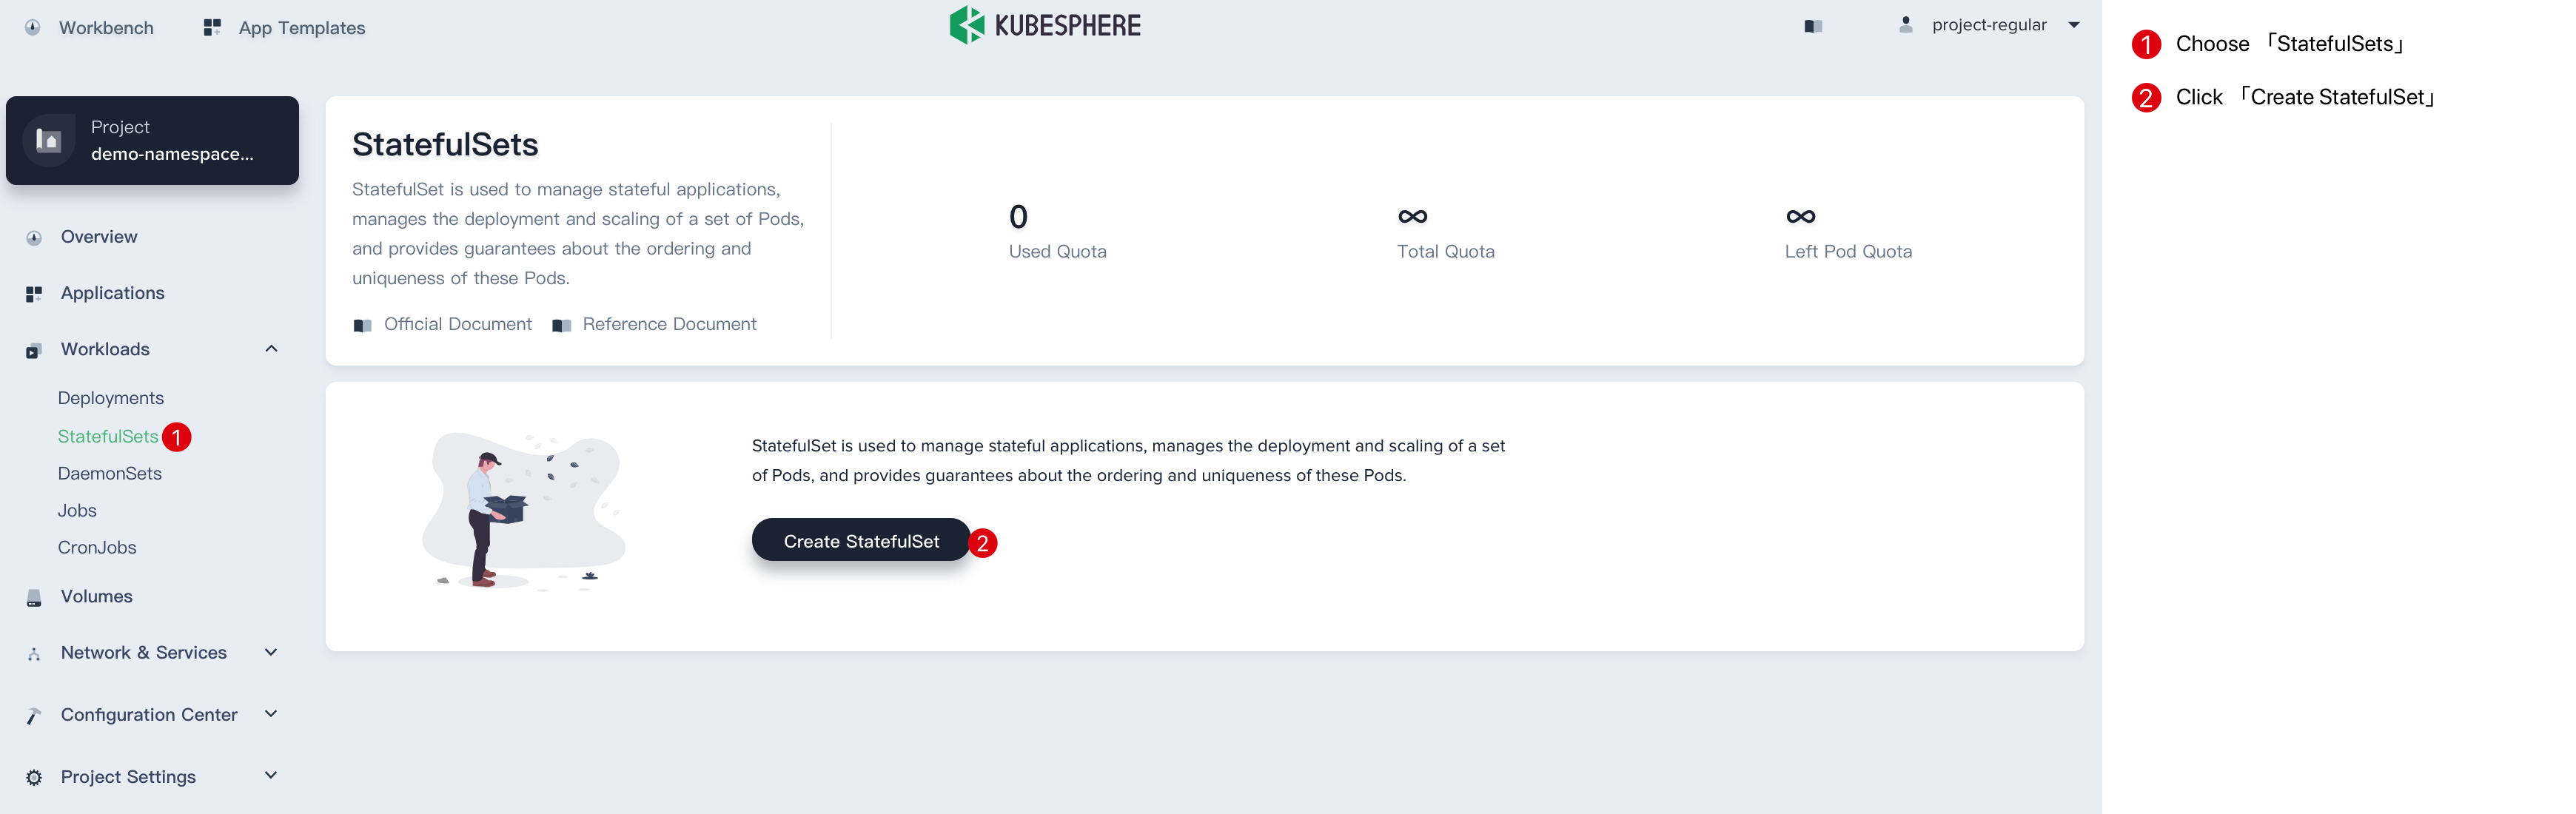
Step 1: Fill in the Basic Information
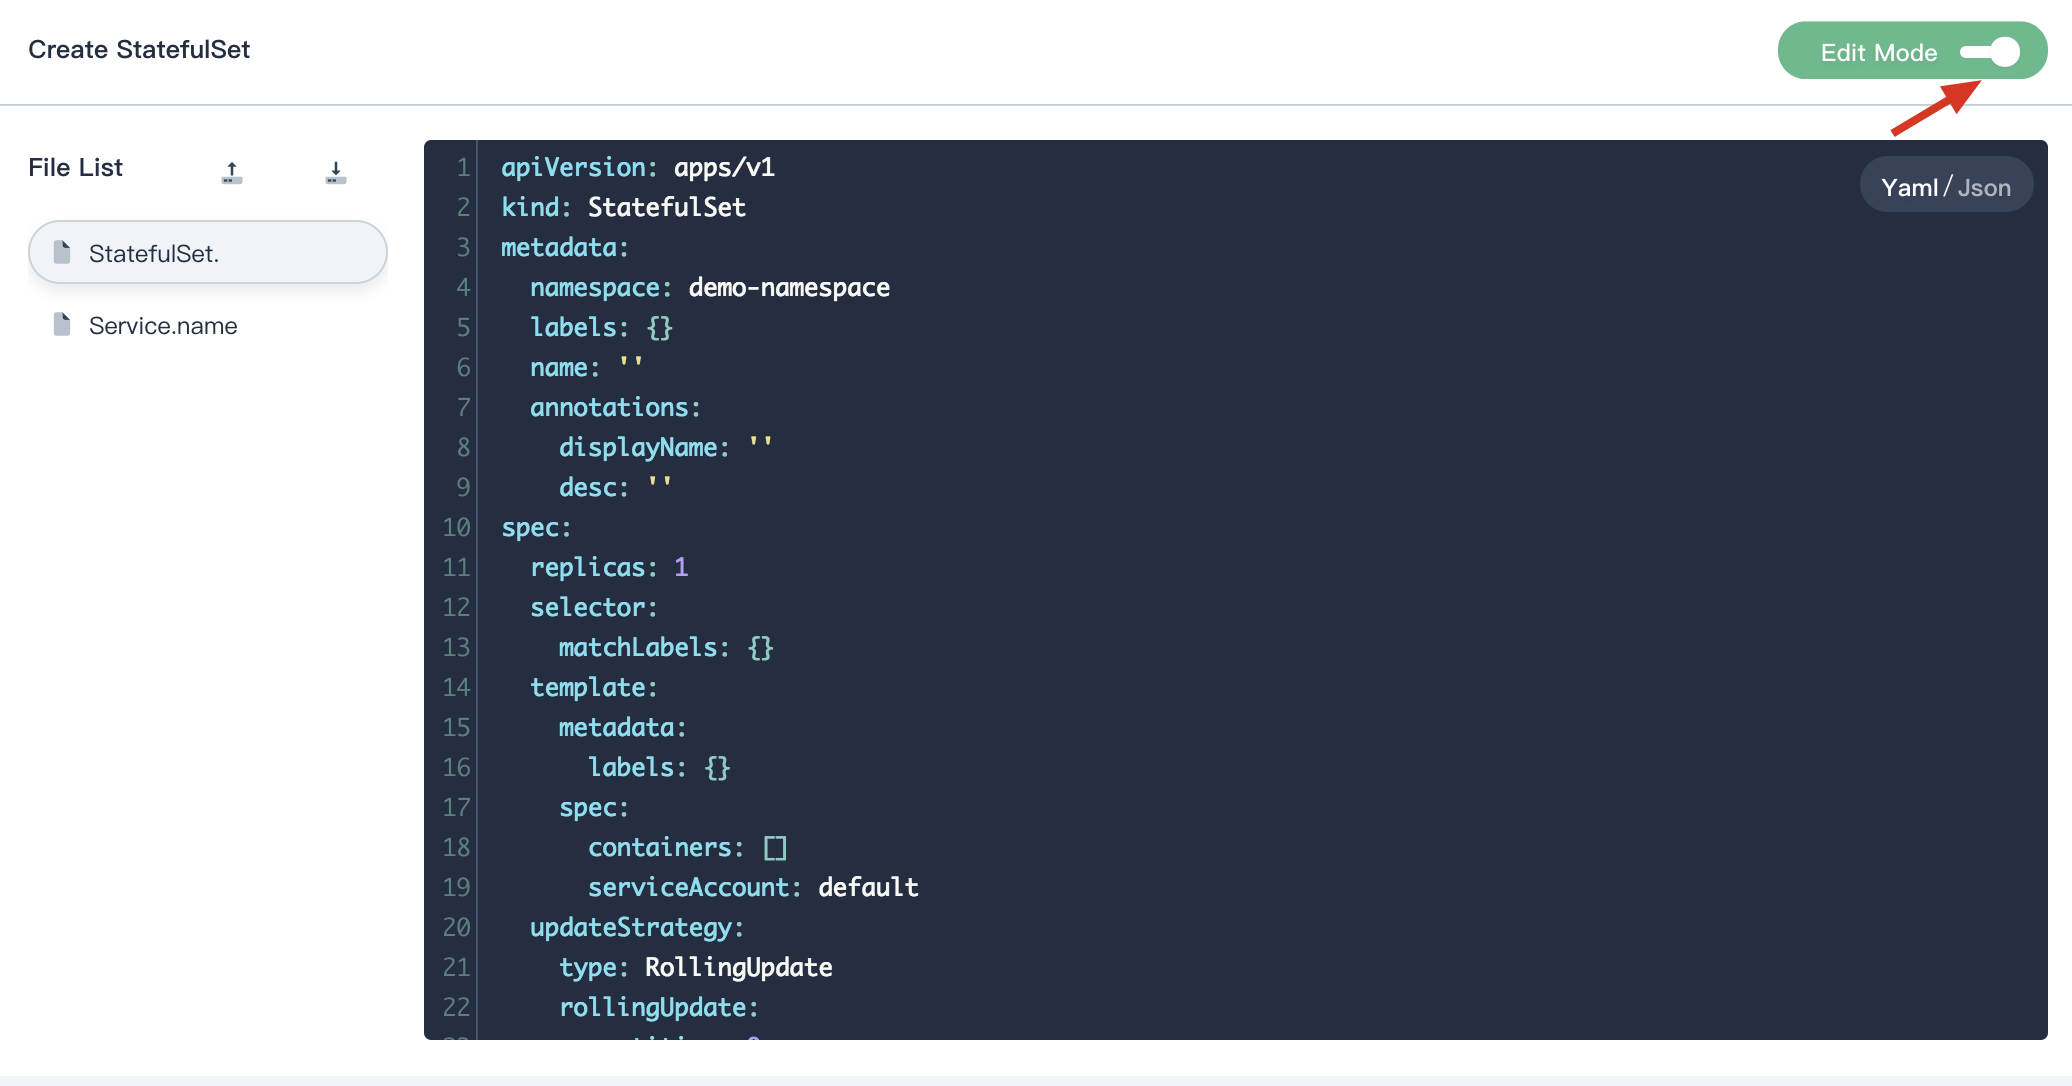
1.1. Click Create StatefulSet button, then fill in the basic information in the pop-up window. There are three ways to create a Statefulset, i.e. fill in the creation table, upload Yaml file and edit mode. The following mainly introduces each step within creation table. If you prefer edit mode, you can click on the edit mode button, it supports the yaml and json formats. Edit mode makes it easy for users who are used to command operations.
1.2. On the basic information page, enter the name of the StatefulSet, you can also fill in the description as required.
- Name: A concise and clear name for this StatefulSet, which is convenient for users to browse and search.
- Alias: Helps you better distinguish resources and supports Chinese.
- Description: A brief introduction to StatefulSet.
Click Next when you're done.

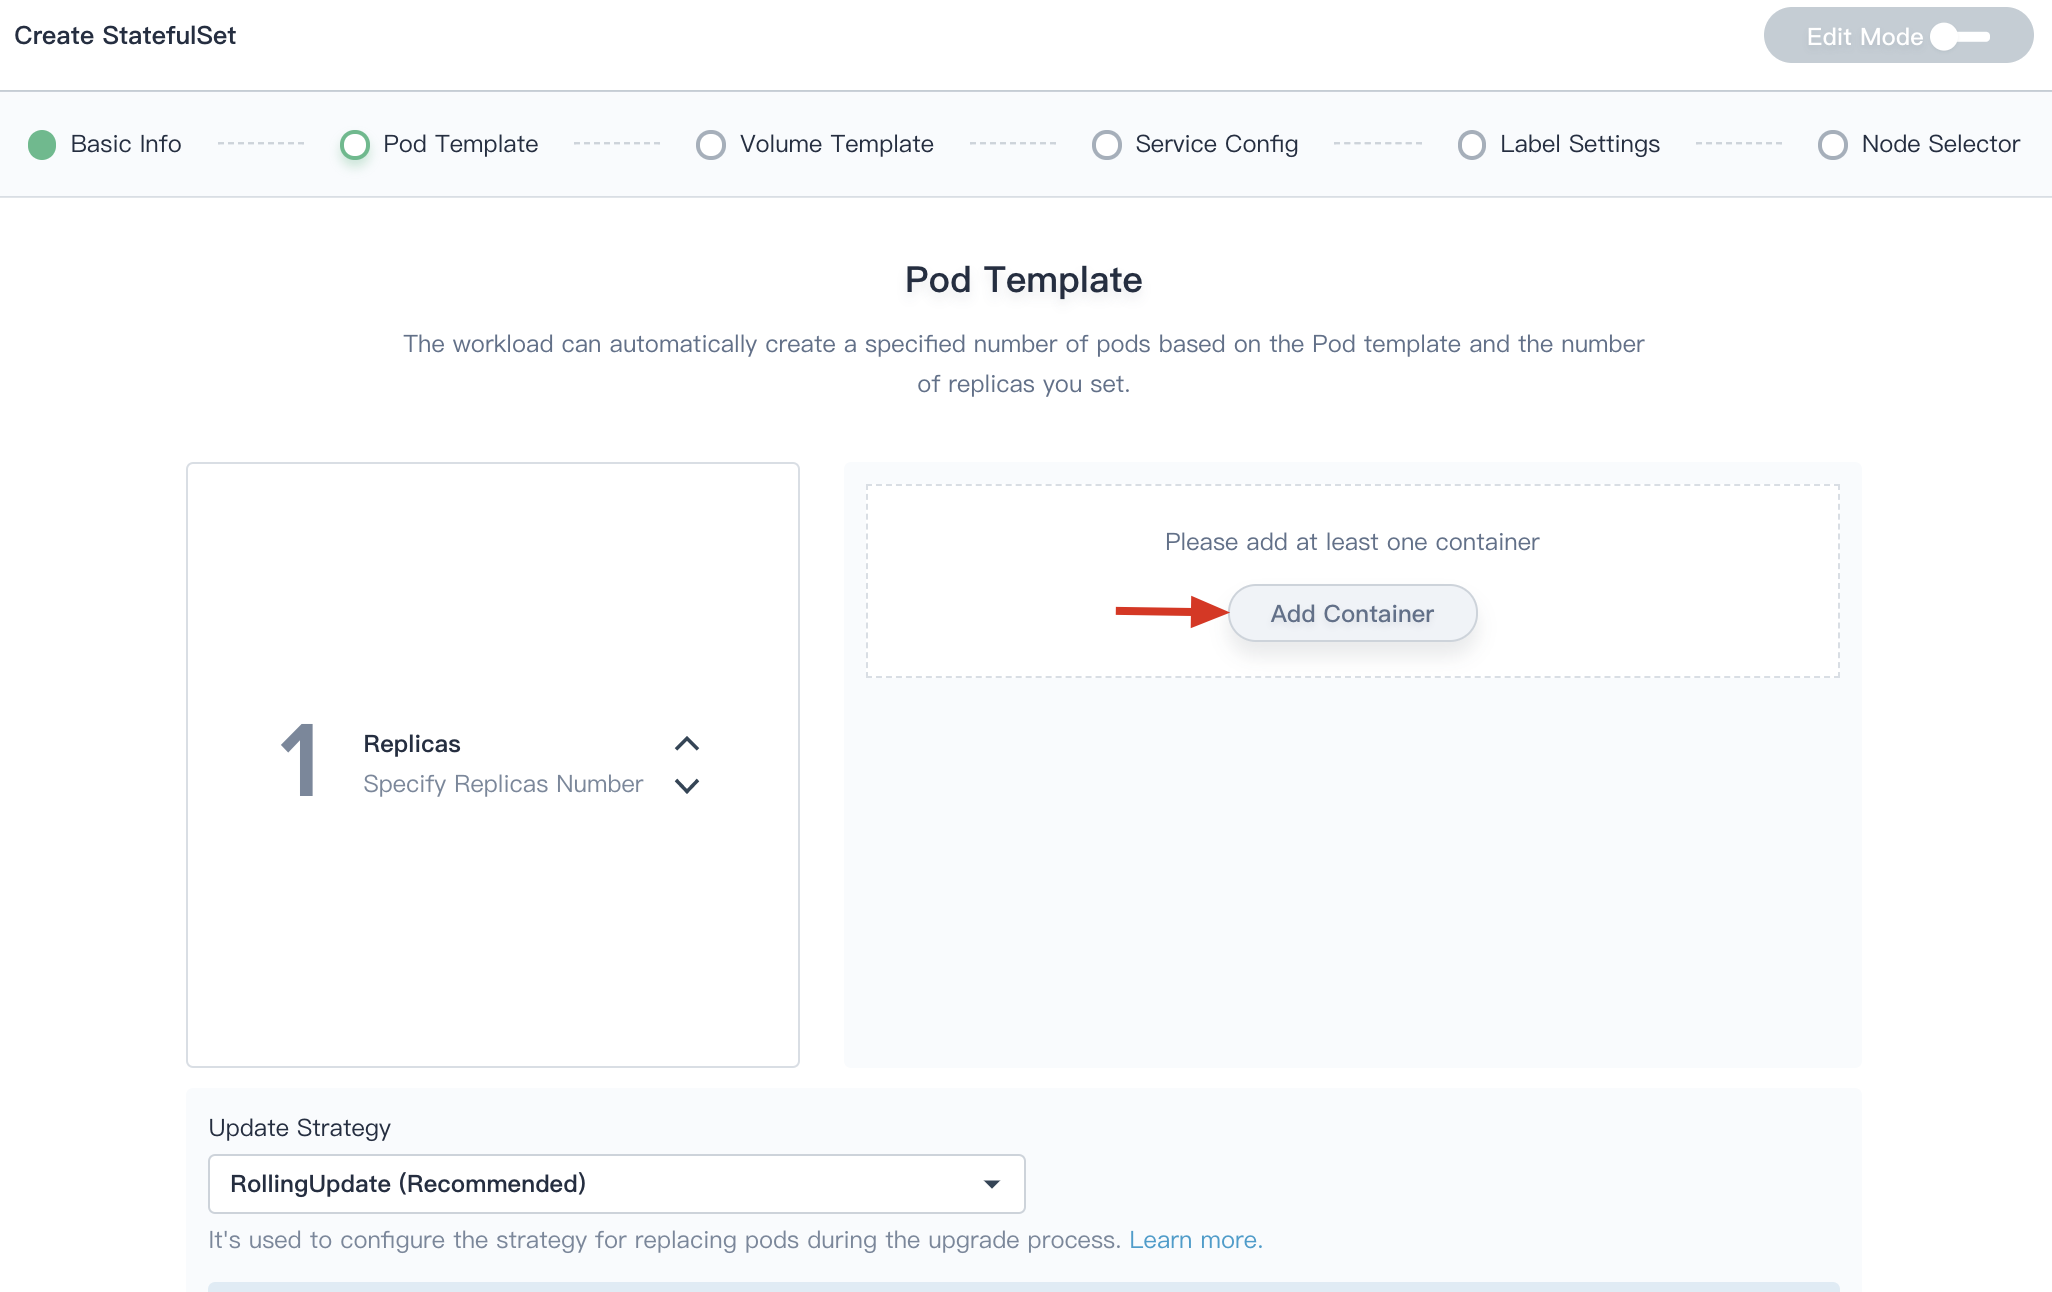
Step 2: Configure the Pod template
2.1. On the Pod Template page, user can set the number of replicas.
Click Add Container to add a container image as needed.
2.2. The image defined in the template is pulled from the DockerHub by default. Enter the name of the container and the corresponding image name. The image name generally needs to be specified with its tag, such as mysql:5.6.
In order to realize the effective scheduling and allocation of resources in the cluster and improve resources utilization, the platform uses requests and limits to allocate resources. Request is usually the minimum resource requirement used by the container, and limit is usually the maximum value of the resource. Setting it to 0 means that there is no restriction on the resources used. Request can ensure that the pod has enough resources to run, and limit is to prevent a Pod from using resources unrestricted,causing other Pods to crash.
Table 1: CPU Quota Description
| Parameter | Description |
|---|---|
| Requests | A request is the amount of that CPU resources that the system will guarantee for the container, and Kubernetes will use this value to decide on which node to place the pod. |
| Limits | A limit is the maximum amount of CPU resources that Kubernetes will allow the container to use. |
Table 2: Memory Quota Description
| Parameter | Description |
|---|---|
| Requests | A request is the amount of that memory resources that the system will guarantee for the container, and Kubernetes will use this value to decide on which node to place the pod. |
| Limits | A limit is the maximum amount of memory resources that Kubernetes will allow the container to use. If the memory usage exceeds this limit, the container may be killed. |
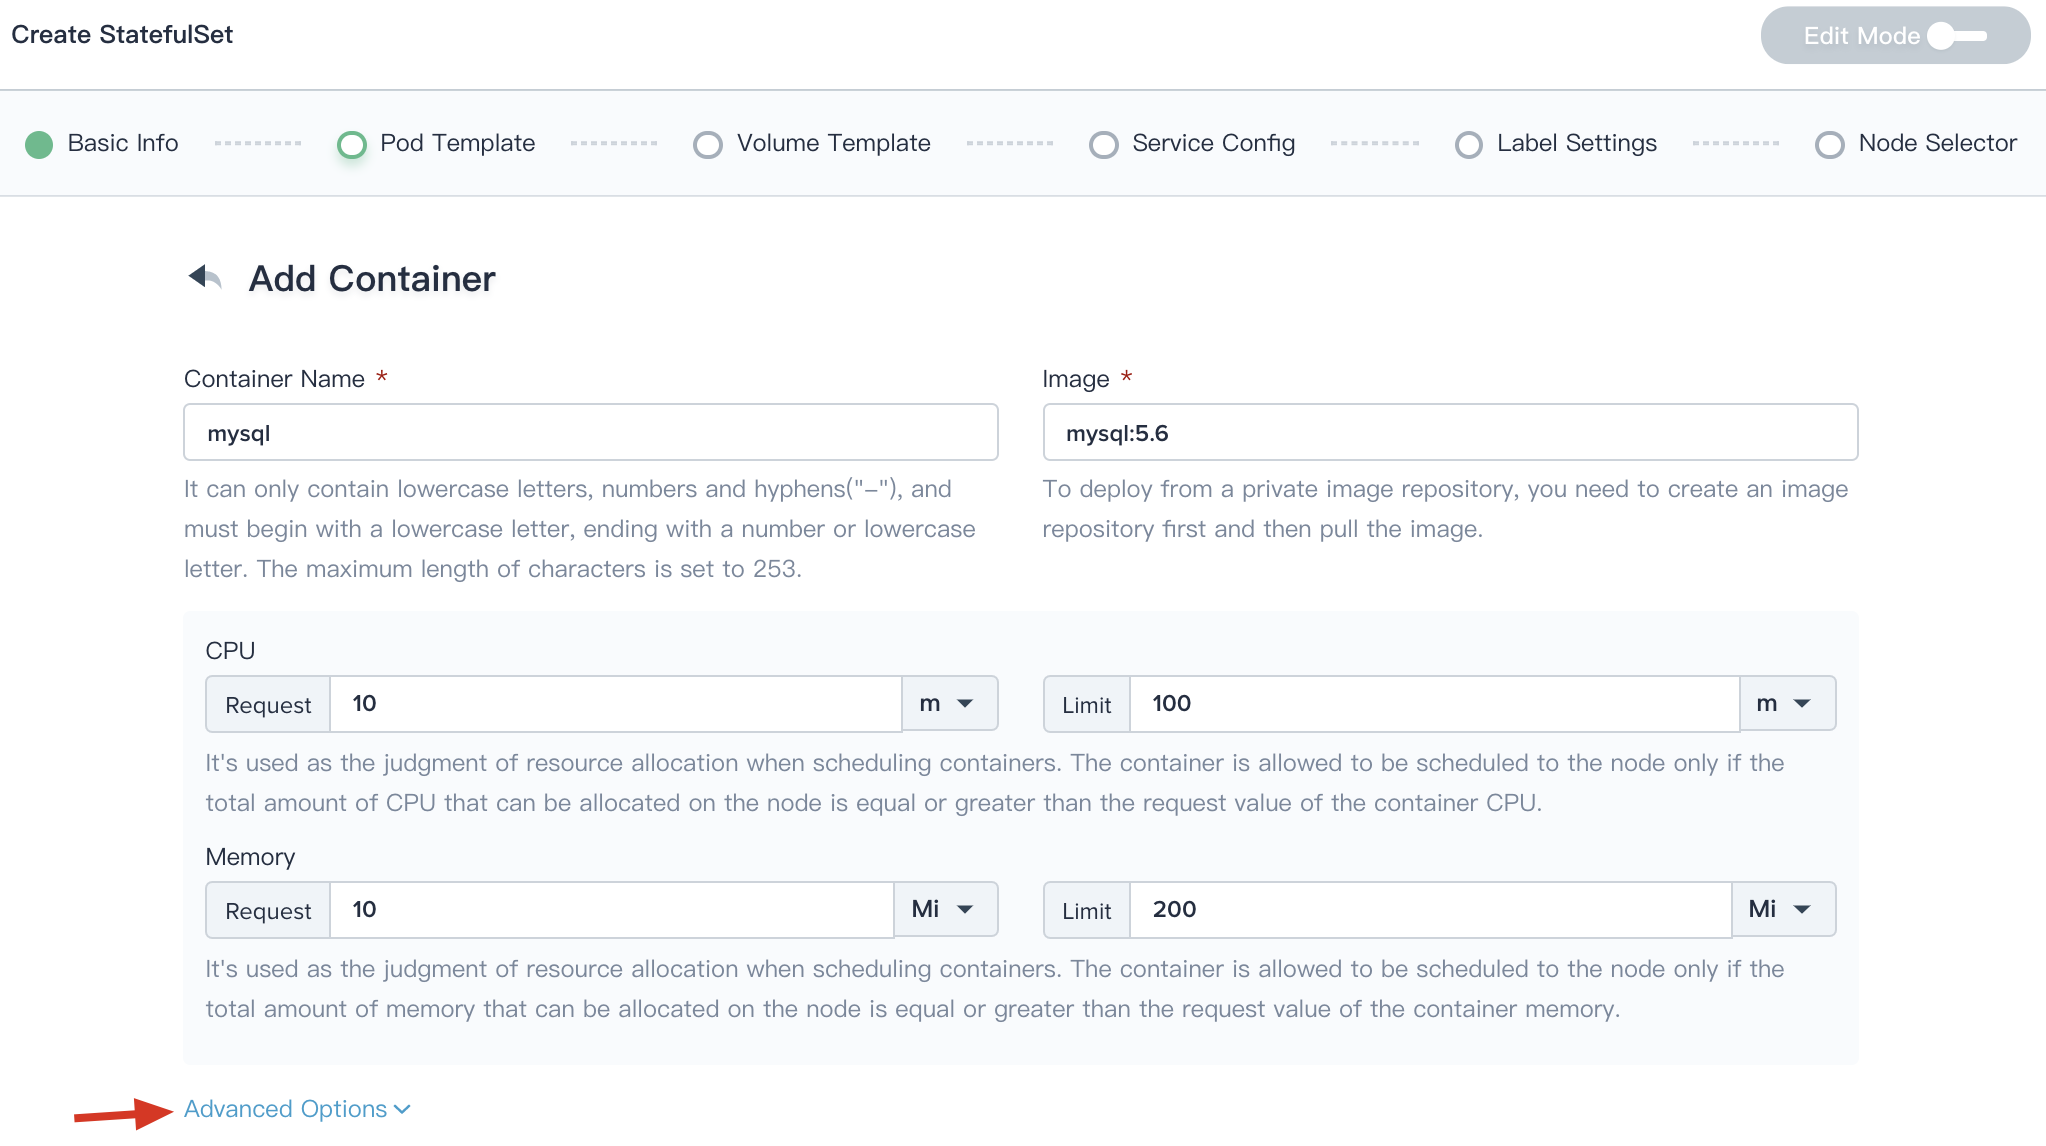
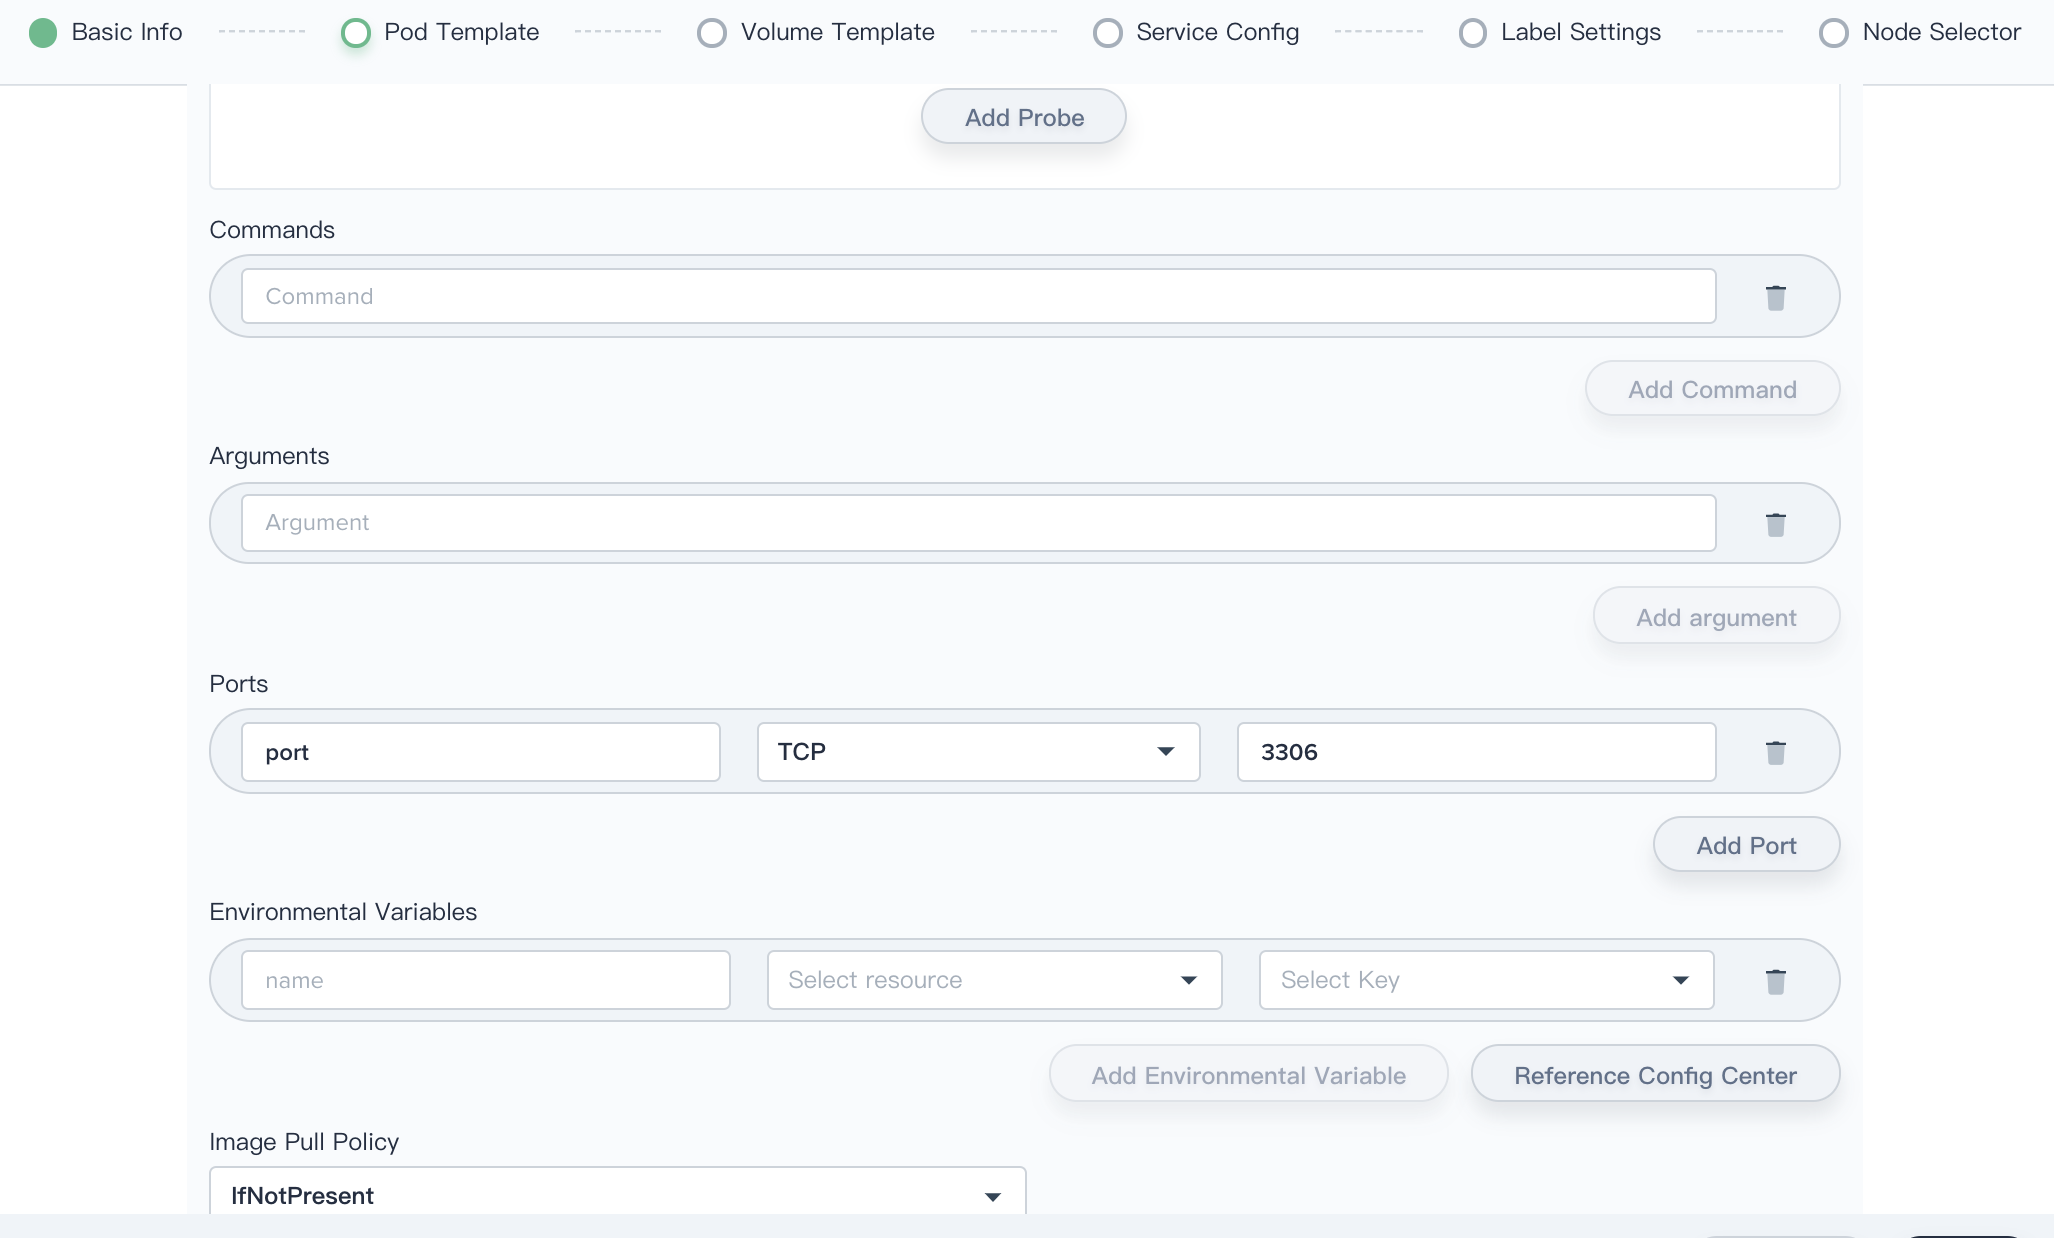
2.3. If the user has further requirements, click on Advanced Options.
- Health Check: Kubernetes defines two types of health check probes for monitoring at the business level. - Liveness Probe: Restarts the application when it detects that the container instance is unhealthy. - Readiness Probe: To know when a Container is ready to start accepting traffic. A Pod is considered ready when all of its Containers are ready.
- Command: In some cases, you need your command to run in a shell, see Kubernetes documentation.
- Arguments: You can defined the arguments directly by providing strings, see Kubernetes documentation.
- Ports: This is the container port that needs to be exposed. The port protocol can be TCP and UDP.
-
Environment Variables: you can define an argument for a Pod using any of the techniques available for defining environment variables, including ConfigMaps and Secrets, which has the same effect as the "ENV" in the Dockerfile, providing great flexibility for creating workloads.
- Reference Configuration Center: Supports adding Secret and ConfigMap as environment variables to save configuration data in the form of key-value pairs. See ConfigMaps and Secrets.
- Image Pull Policy: imagePullPolicy, the default image pull policy is IfNotPresent, the kubelet will no longer pull the image if the image already exists. If you need to pull the image frequently, set the pull policy to Always. If the container property imagePullPolicy is set to IfNotPresent or Never, the local image will be used first.
Click Save when setup is complete.
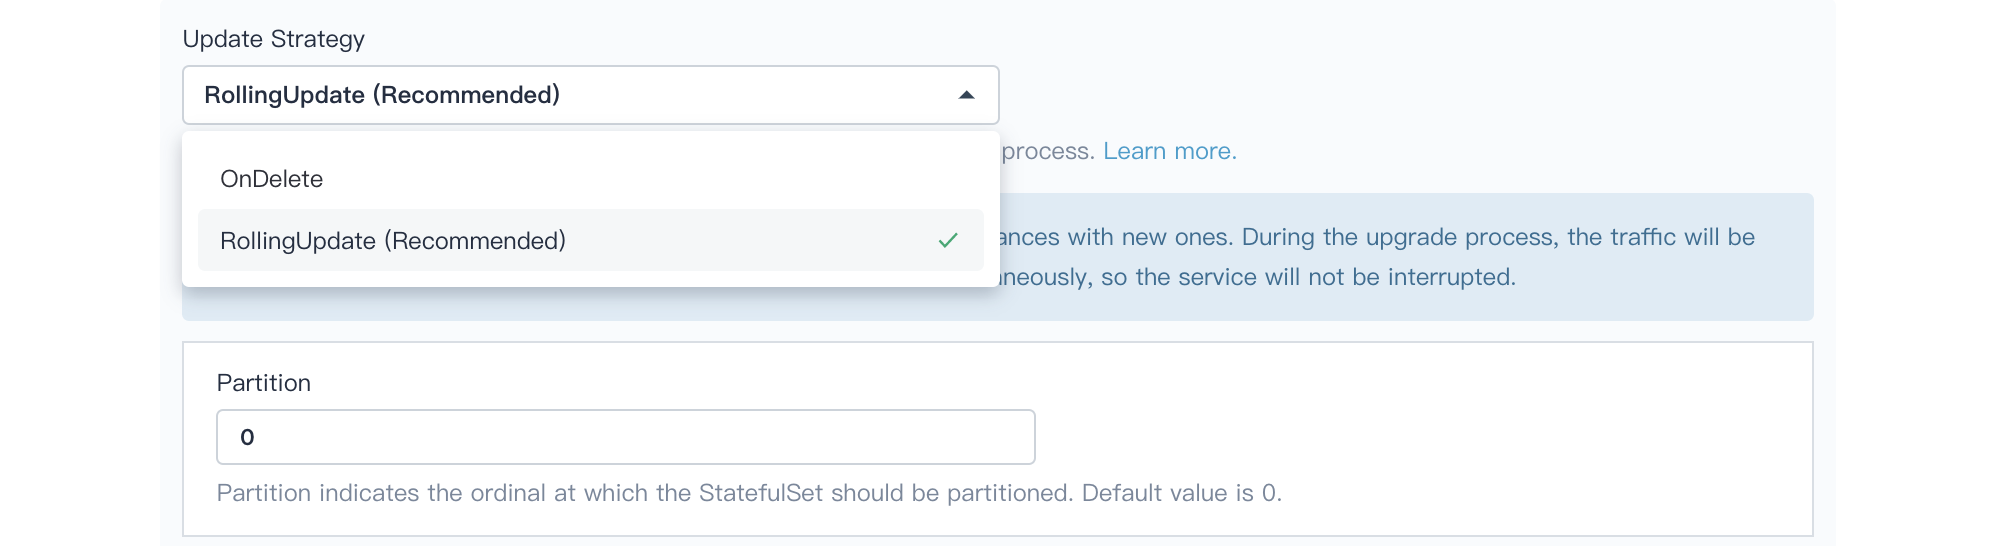
Update Strategy
Update policies include RollingUpdate and OnDelete:
-
RollingUpdate: It is recommended to update the StatefulSets using Rolling-update. The StatefulSet controller will delete and recreate each Pod in the StatefulSet.
-
OnDelete: the StatefulSet controller will not automatically update the Pods in a StatefulSet. Users must manually delete Pods to cause the controller to create new Pods that reflect modifications made to a StatefulSet.
- Partition: Default value is 0. If a partition is specified, all Pods with an ordinal that is greater than or equal to the partition will be updated when the StatefulSet’s template is updated. In most cases you will not need to use a partition, but they are useful if you want to stage an update, roll out a canary, or perform a phased roll out.
After completing the above configuration information, click Next.
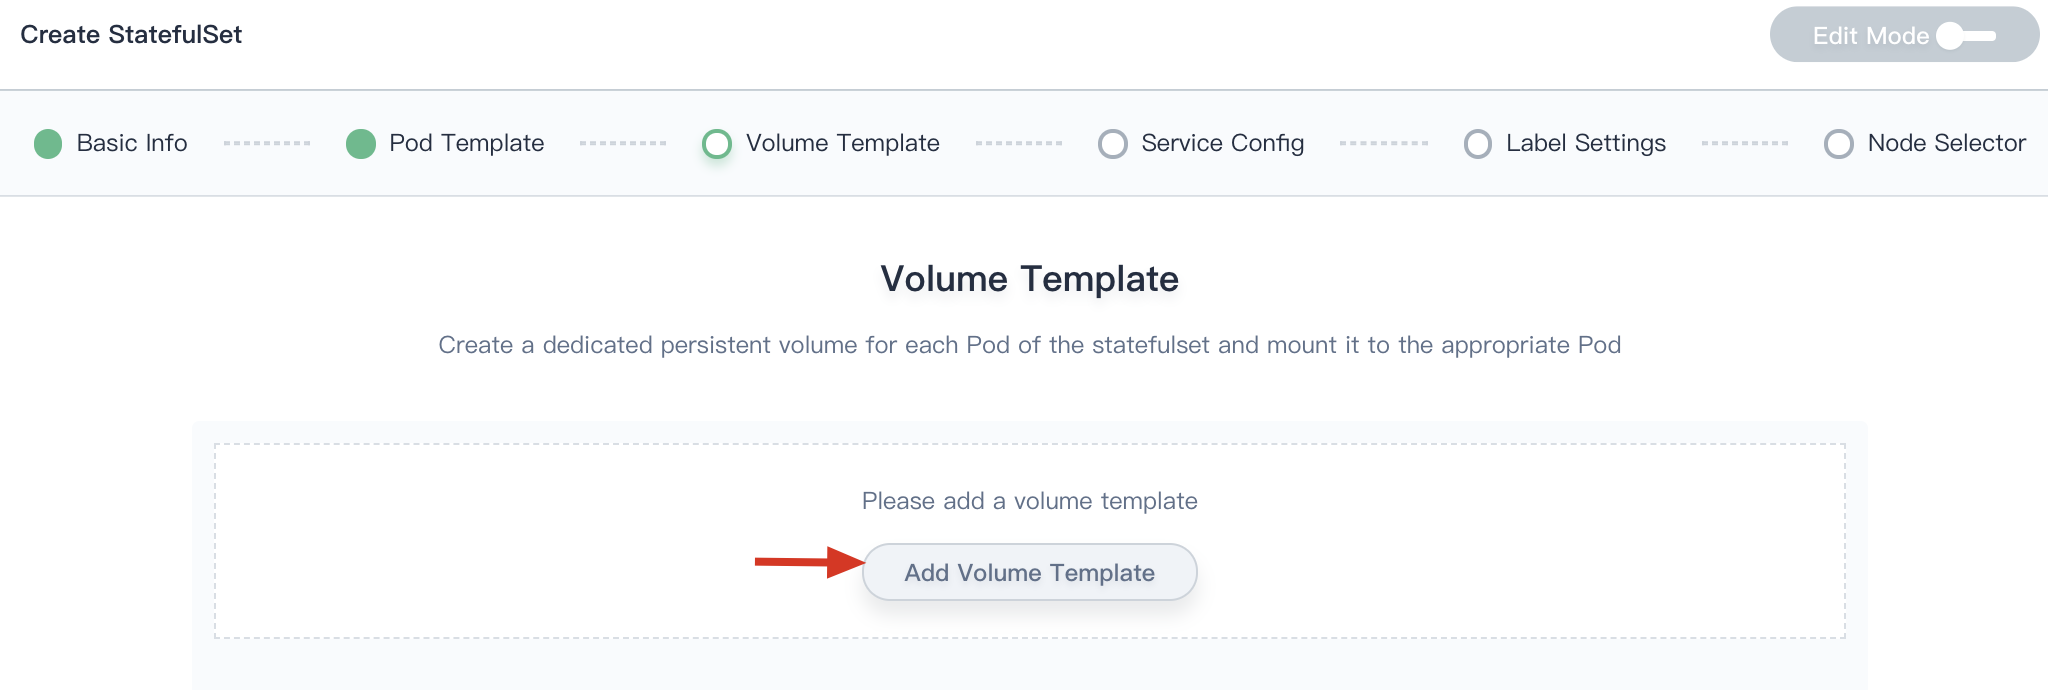
Step 3: Volume Template
3.1. Click Add Volume Template.
3.2. Fill in the name of the volume, select the storage type (e.g. local or csi-qingcloud), and the storage class needs to be created in advance, see Create Storage Class. Then specify the capacity and access mode of the volume to determine the mount path of the volume in the container, as described in Volumes.
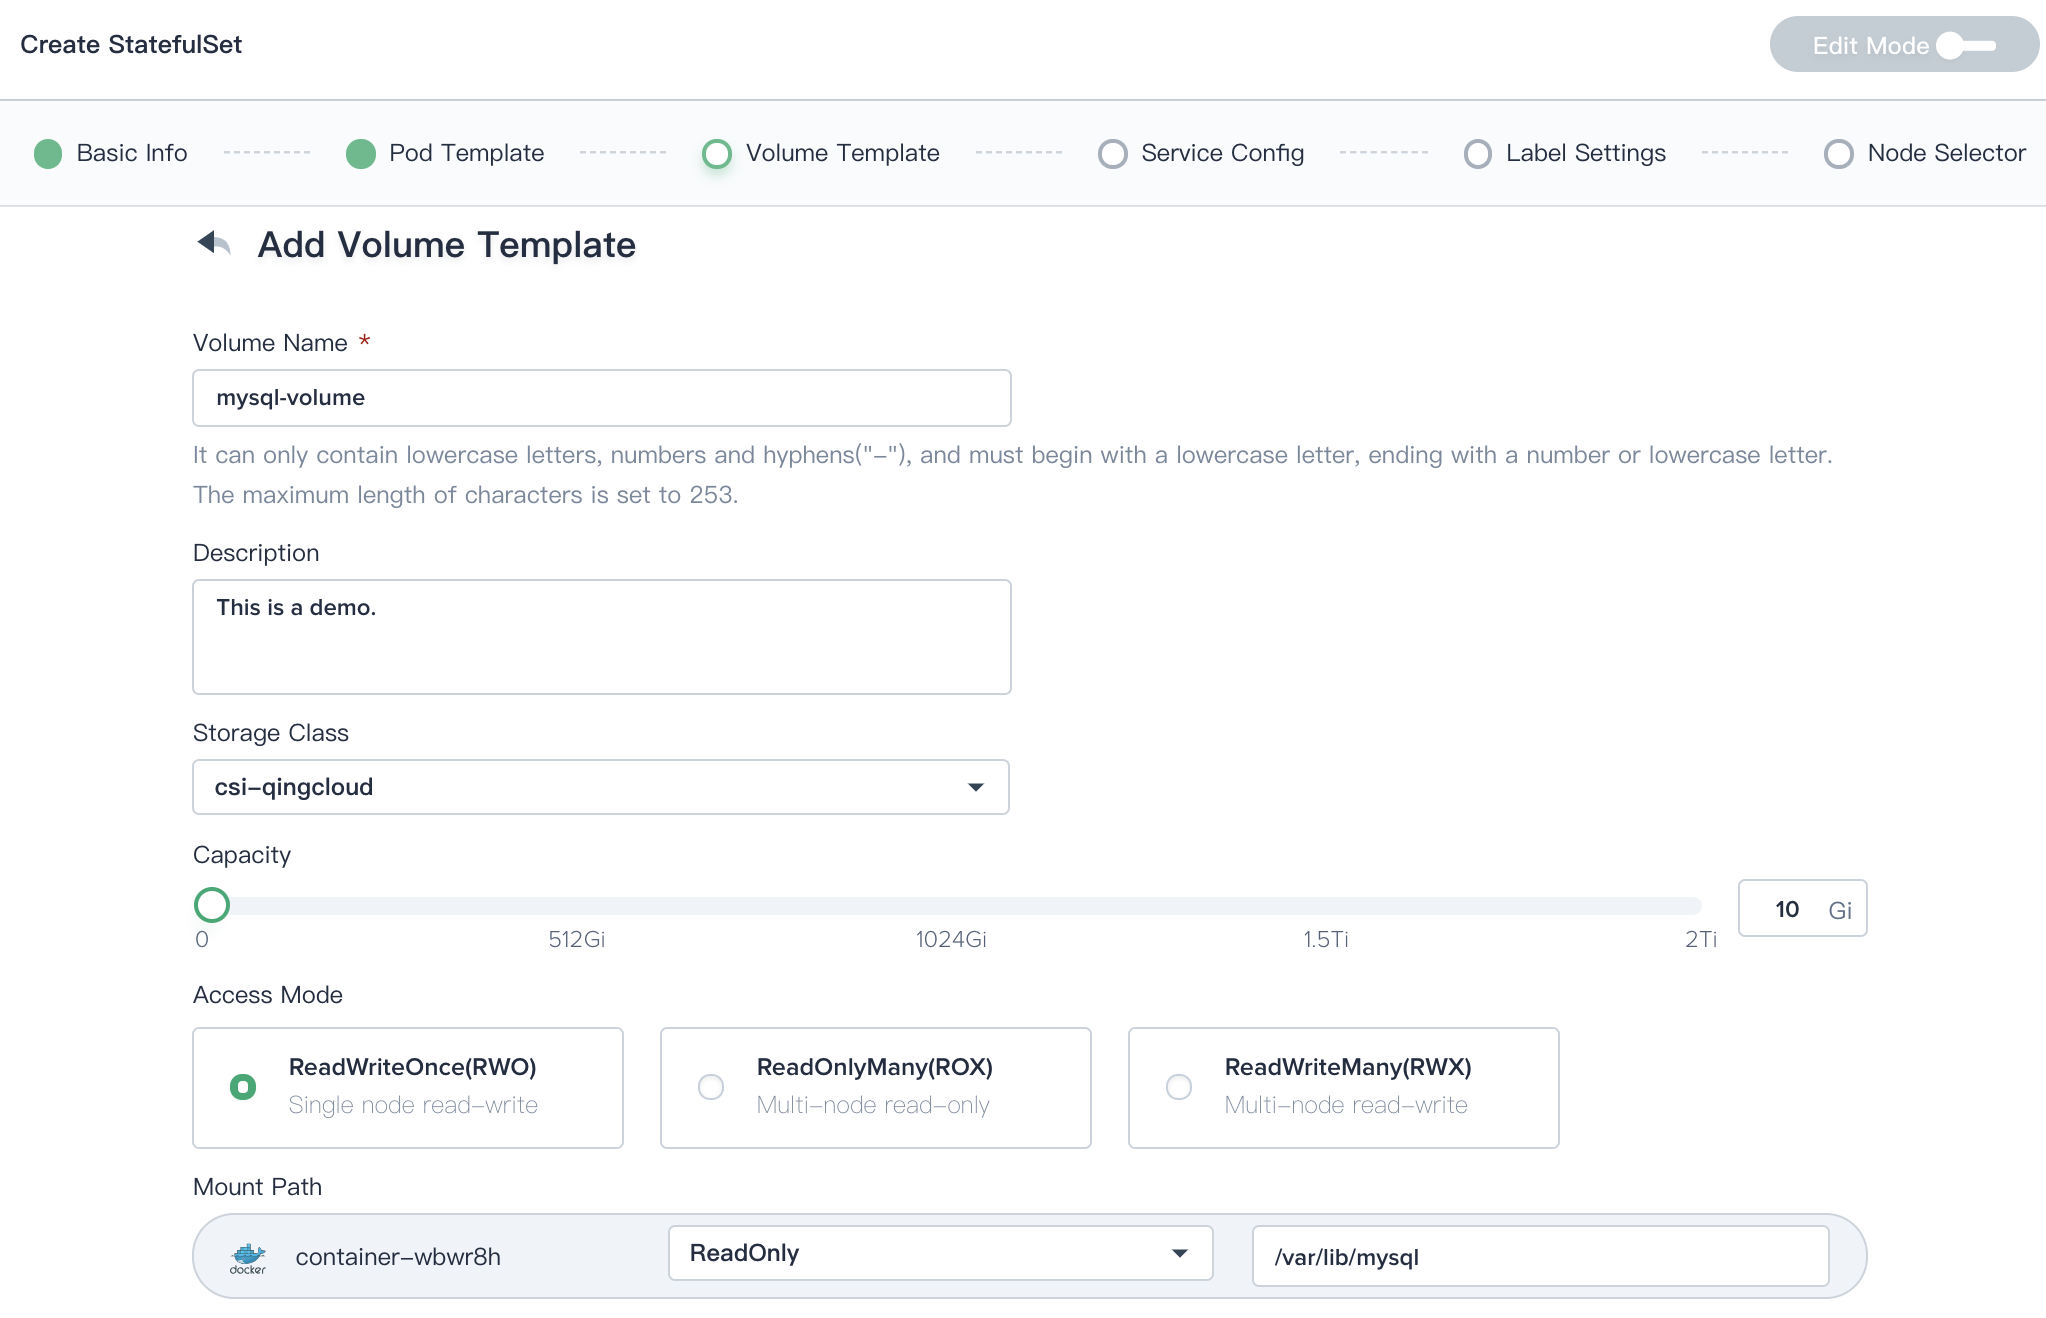
Click on the Save button when you're done, then choose Next.
Step 4: Service Configuration
StatefulSets currently require a Headless Service to be responsible for the network identity of the Pods. THe service name could be customerized, The target port corresponds to the port exposed by the container.
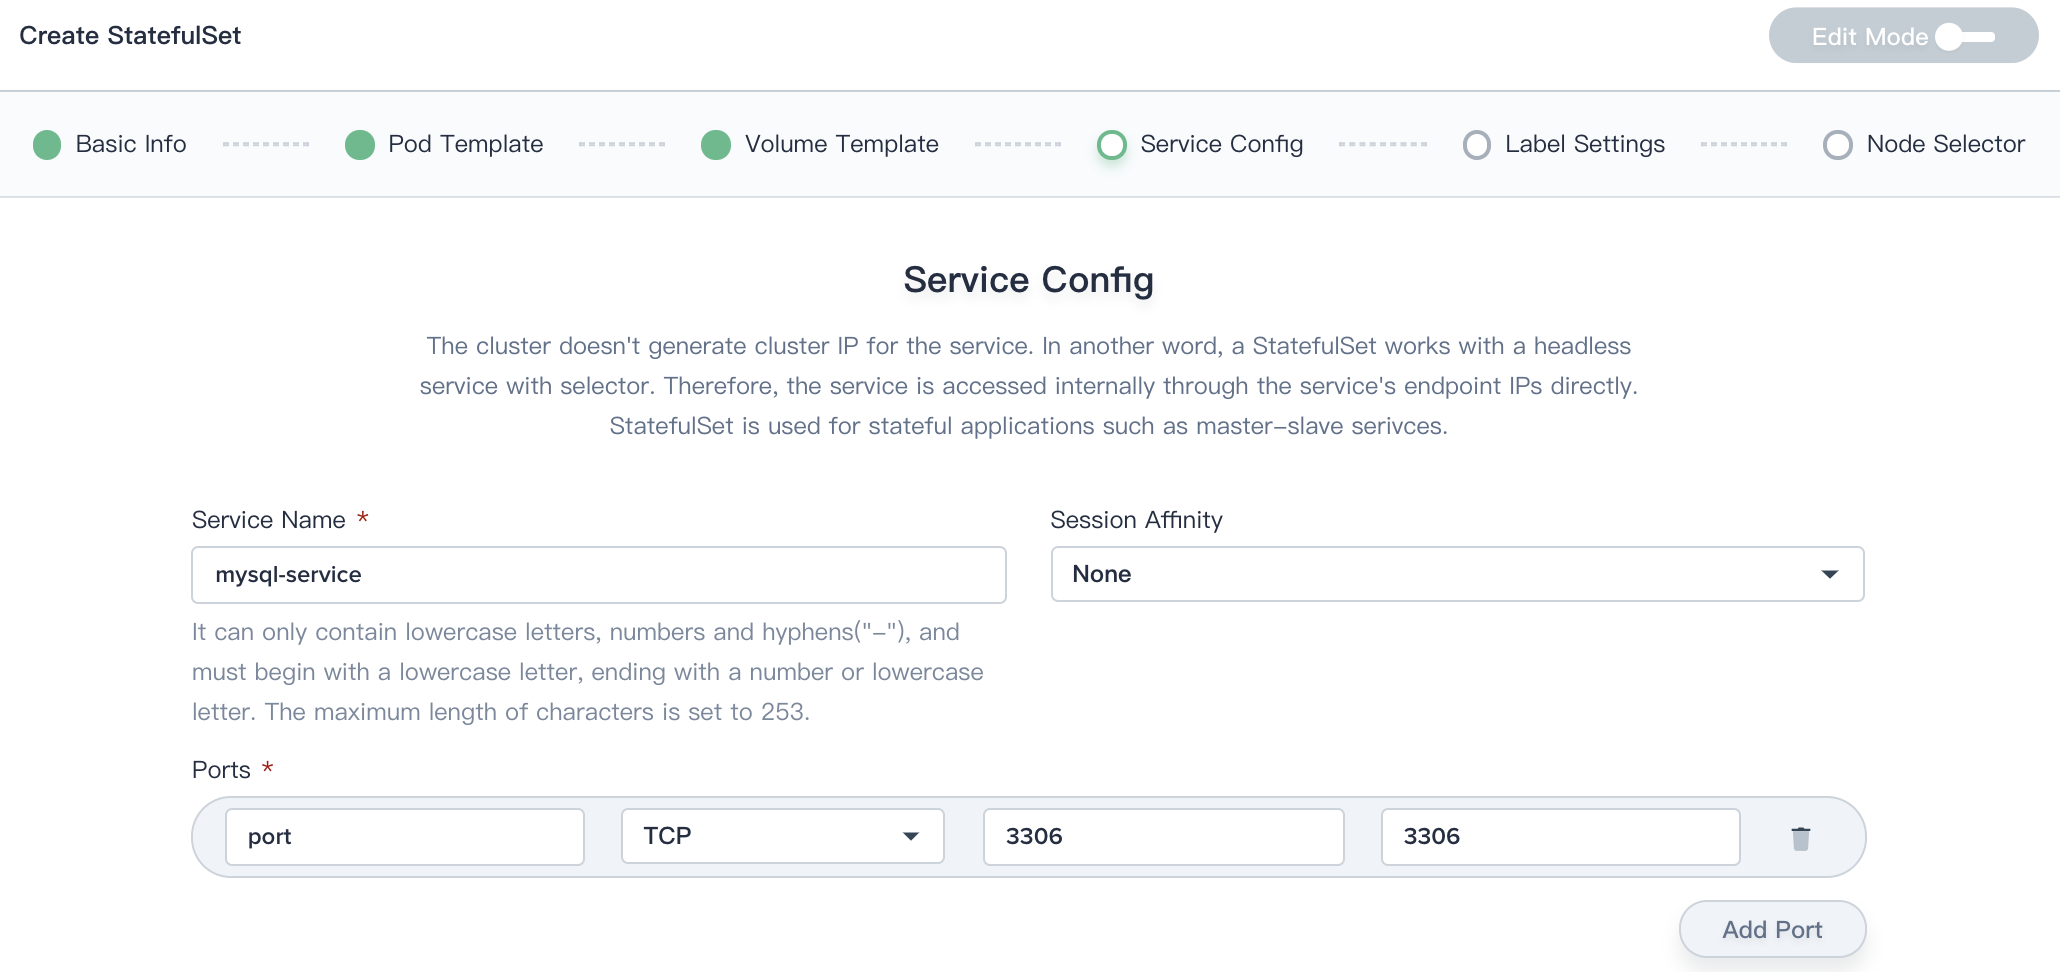
Click on the Next button when you're done.
Step 5: Label Settings
Labels are key/value pairs that are attached to objects, such as pods. Labels are intended to be used to specify identifying attributes of objects that are meaningful and relevant to users. Labels can be used to organize and to select subsets of objects, each object can have a set of key/value labels defined, such as app: mysql ; tier: frontend.
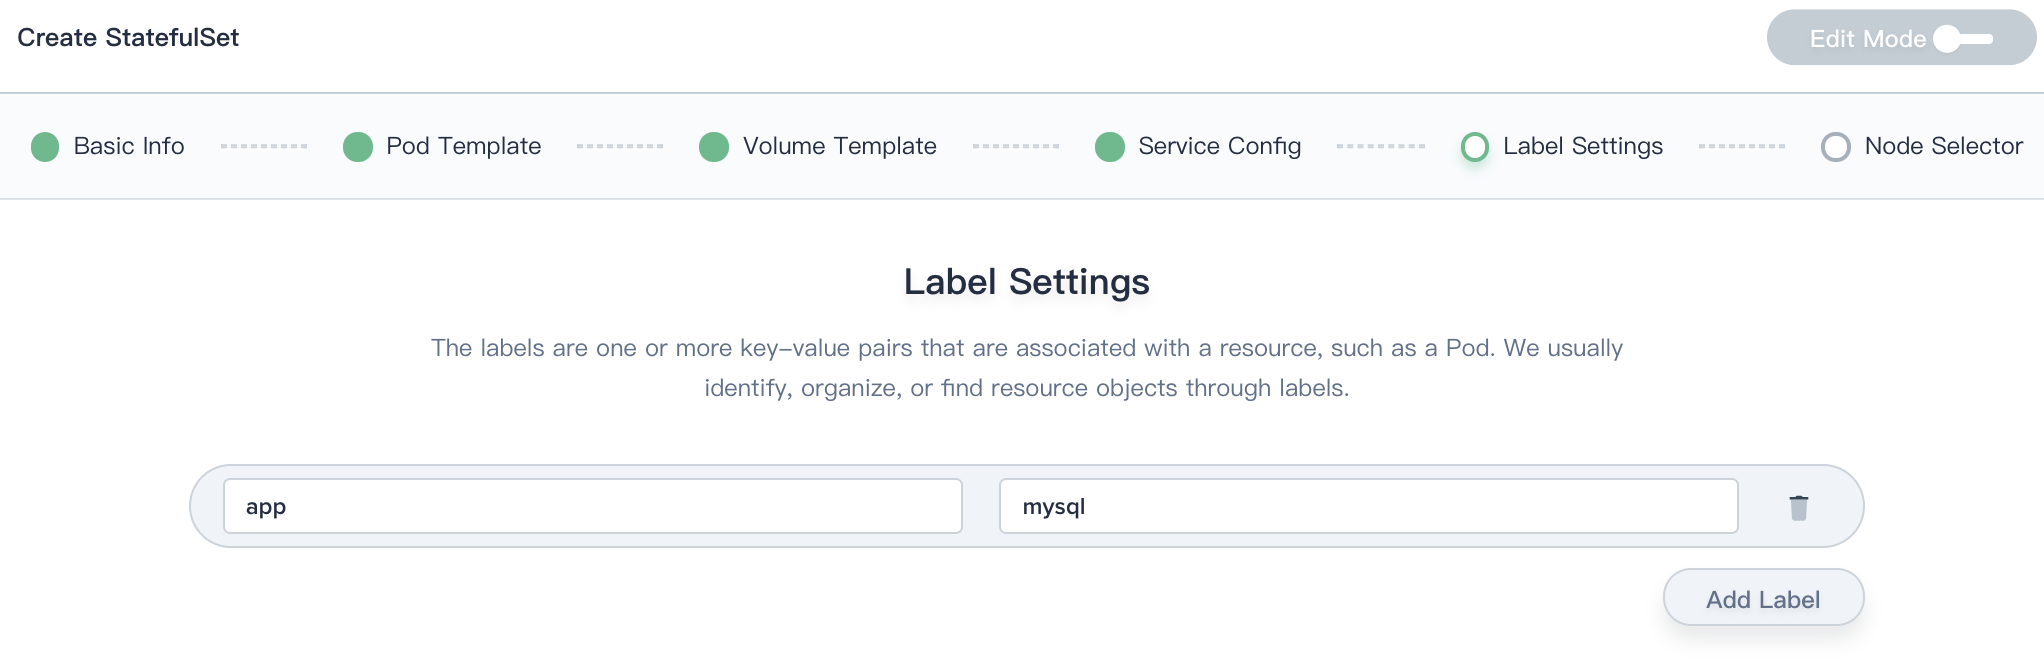
Click on the Next button when you're done.
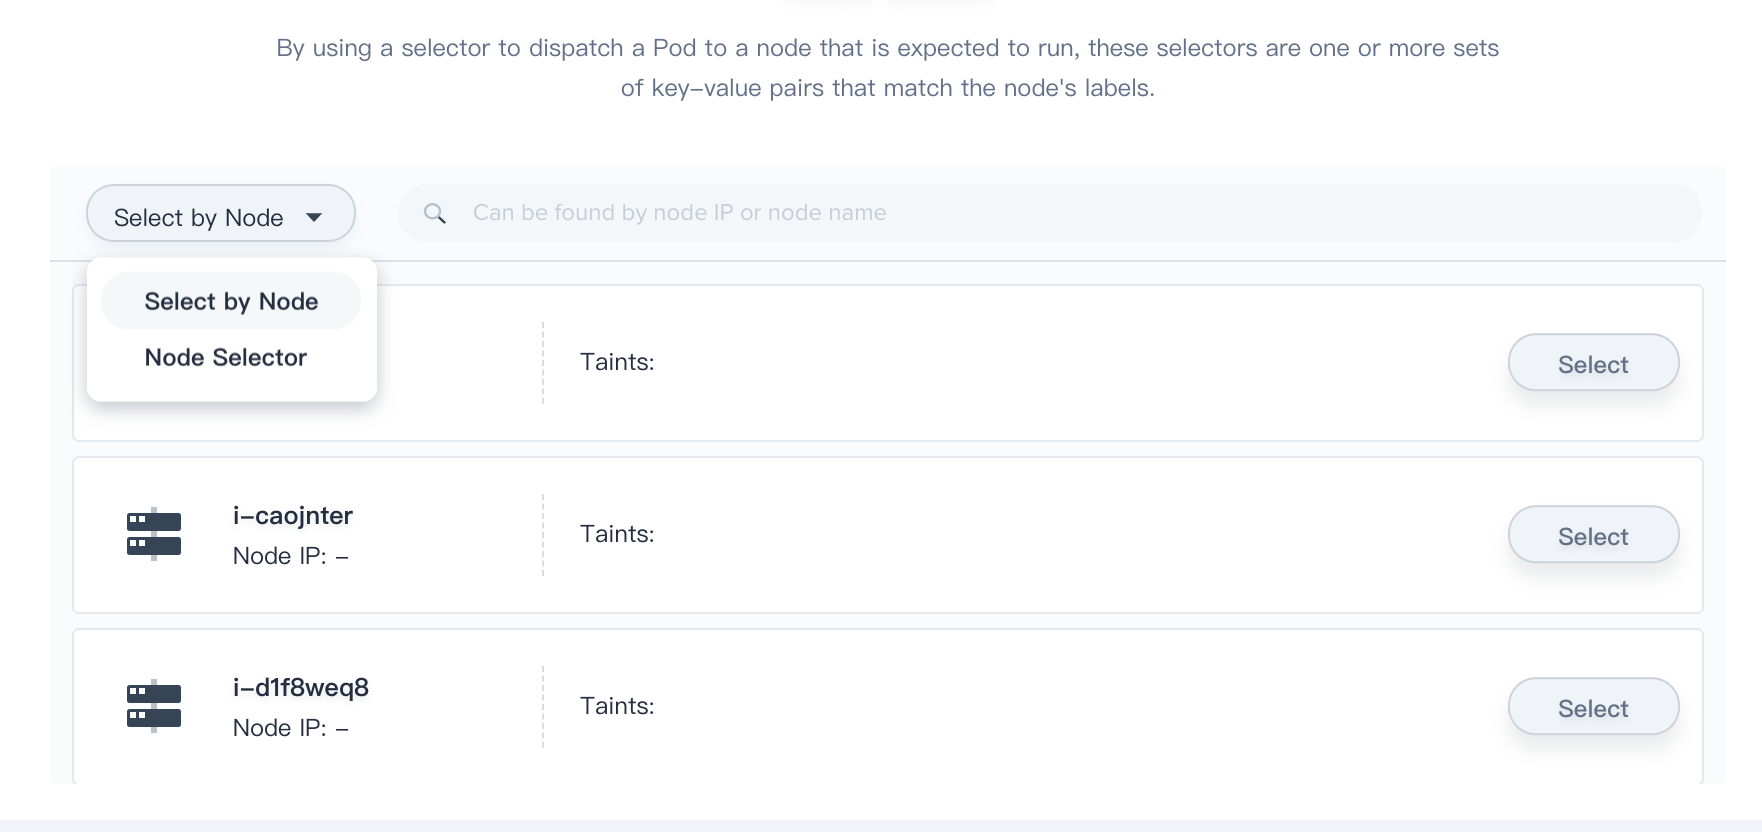
Step 6: Node Selector
For the pod to be eligible to run on a node, the node must have each of the indicated key-value pairs as labels (it can have additional labels as well). The user can specify the node on which the Pod is expected to run by setting one or more sets of key-value pairs or select node directly. When not specified, the Pod will likely be scheduled to any node in the cluster that meets the resource scheduling criteria.
Click Create to complete the creation of the StatefulSet resource. The status display “Updating” is due to it's pulling the image. After the image pull succeeds, the status will display “Running”.