v2.0
v1.0
  1. Release Notes
    1. Release Notes - 2.0.2Latest
    1. Release Notes - 2.0.1
    1. Release Notes - 2.0.0
  1. Introduction
    1. Introduction
    1. Features
    1. Architecture
    1. Advantages
    1. Glossary
  1. Installation
    1. Intruction
      1. Intro
      2. Port Requirements
    1. Install on Linux
      1. All-in-One Installation
      2. Multi-Node Installation
      3. Installing HA Master and Etcd Cluster
      4. Storage Configuration Instruction
    1. Install on Kubernetes
      1. Prerequisites
      2. Online Installation
      3. Offline Installation
    1. Related Tools
      1. Integrating Harbor Registry
    1. Cluster Operation
      1. Adding New Nodes
      2. High Risk Operation
      3. Uninstalling KubeSphere
  1. Quick Start
    1. Getting Started with Multitenancy
    1. Exposing your APP using Ingress
    1. Deploying a MySQL Application
    1. Deploying a Wordpress Website
    1. Job to compute π to 2000 places
    1. Deploying Grafana using APP Template
    1. Creating Horizontal Pod Autoscaler
    1. S2i: Publish your app without Dockerfile
    1. Canary Release of Microservice APP
    1. CI/CD based on Spring Boot Project
    1. Building a Pipeline in a Graphical Panel
    1. CI/CD based on GitLab and Harbor
    1. Ingress-Nginx for Grayscale Release
  1. Cluster Admin Guide
    1. Multi-tenant Management
      1. Overview of Multi-tenant Management
      2. Overview of Role Management
    1. Platform Management
      1. Account Management
      2. Platform Roles Management
    1. Infrastructure
      1. Service Components
      2. Nodes
      3. Storage Classes
    1. Monitoring Center
      1. Physical Resources
      2. Application Resources
    1. Application Repository
    1. Jenkins System Settings
  1. User Guide
    1. Application Template
    1. Workloads
      1. Deployments
      2. StatefulSets
      3. DaemonSets
      4. Jobs
      5. CronJobs
    1. Storage
      1. Volumes
    1. Network & Services
      1. Services
      2. Routes
    1. Configuration Center
      1. Secret
      2. ConfigMap
      3. Image Registry
    1. Project Settings
      1. Basic Information
      2. Member Roles
      3. Project Members
      4. Internet Access
    1. DevOps Project
      1. DevOps Project Management
      2. DevOps Project Management
      3. DevOps Project Management
      4. DevOps Project Management
      5. DevOps Project Management
  1. Development Guide
    1. Preparing the Development Environment
    1. Development Workflow
  1. API Documentation
    1. API Guide
    1. How to invoke KubeSphere API
KubeSphere®️ 2020 All Rights Reserved.

Member Roles

User rights and access management relies on role definitions, which identify the user's identity and define the relationship between the user and the resources that are accessible/operable. When the built-in role does not meet the usage requirements, you can create a custom role for the user based on the actual scenario. The biggest advantage of the custom role is the fine-grained management of the platform resources. Specify which of the specified resources the role has Permissions.

Prerequisites

You need to create a project-admin and ws-admin, see the Admin Quick Start if not yet.

Create a Role

Sign in with project-admin, enter into one project (e.g. demo-namespace), then select Project Settings → Member Roles.

Create a Role

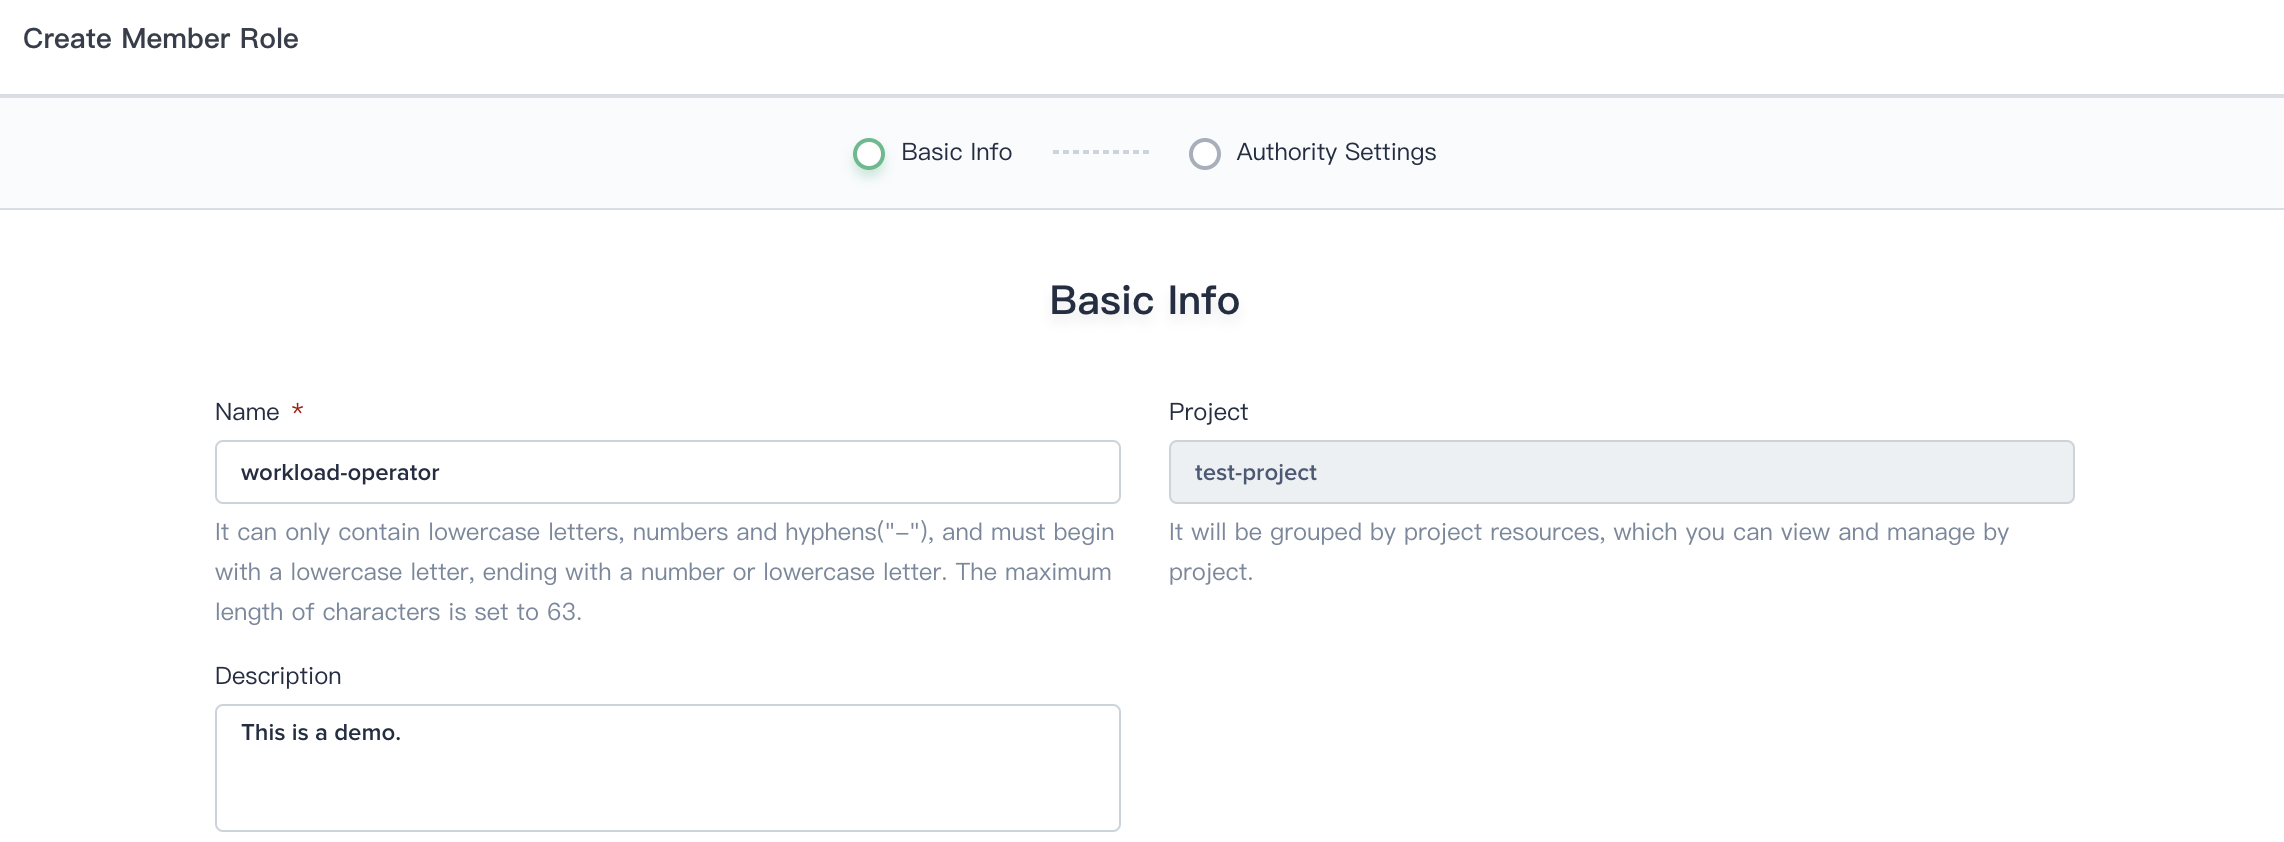
Step 1: Fill in the Basic Information

Click the Create button to create a role, fill in the basic information and set permissions.

For example, we can create a workload-operator role who only owns the workload operation access.

  • Name: A concise and clear name for this ConfigMap, which is convenient for users to browse and search.
  • Description: A brief introduction to ConfigMap.

Basic Information

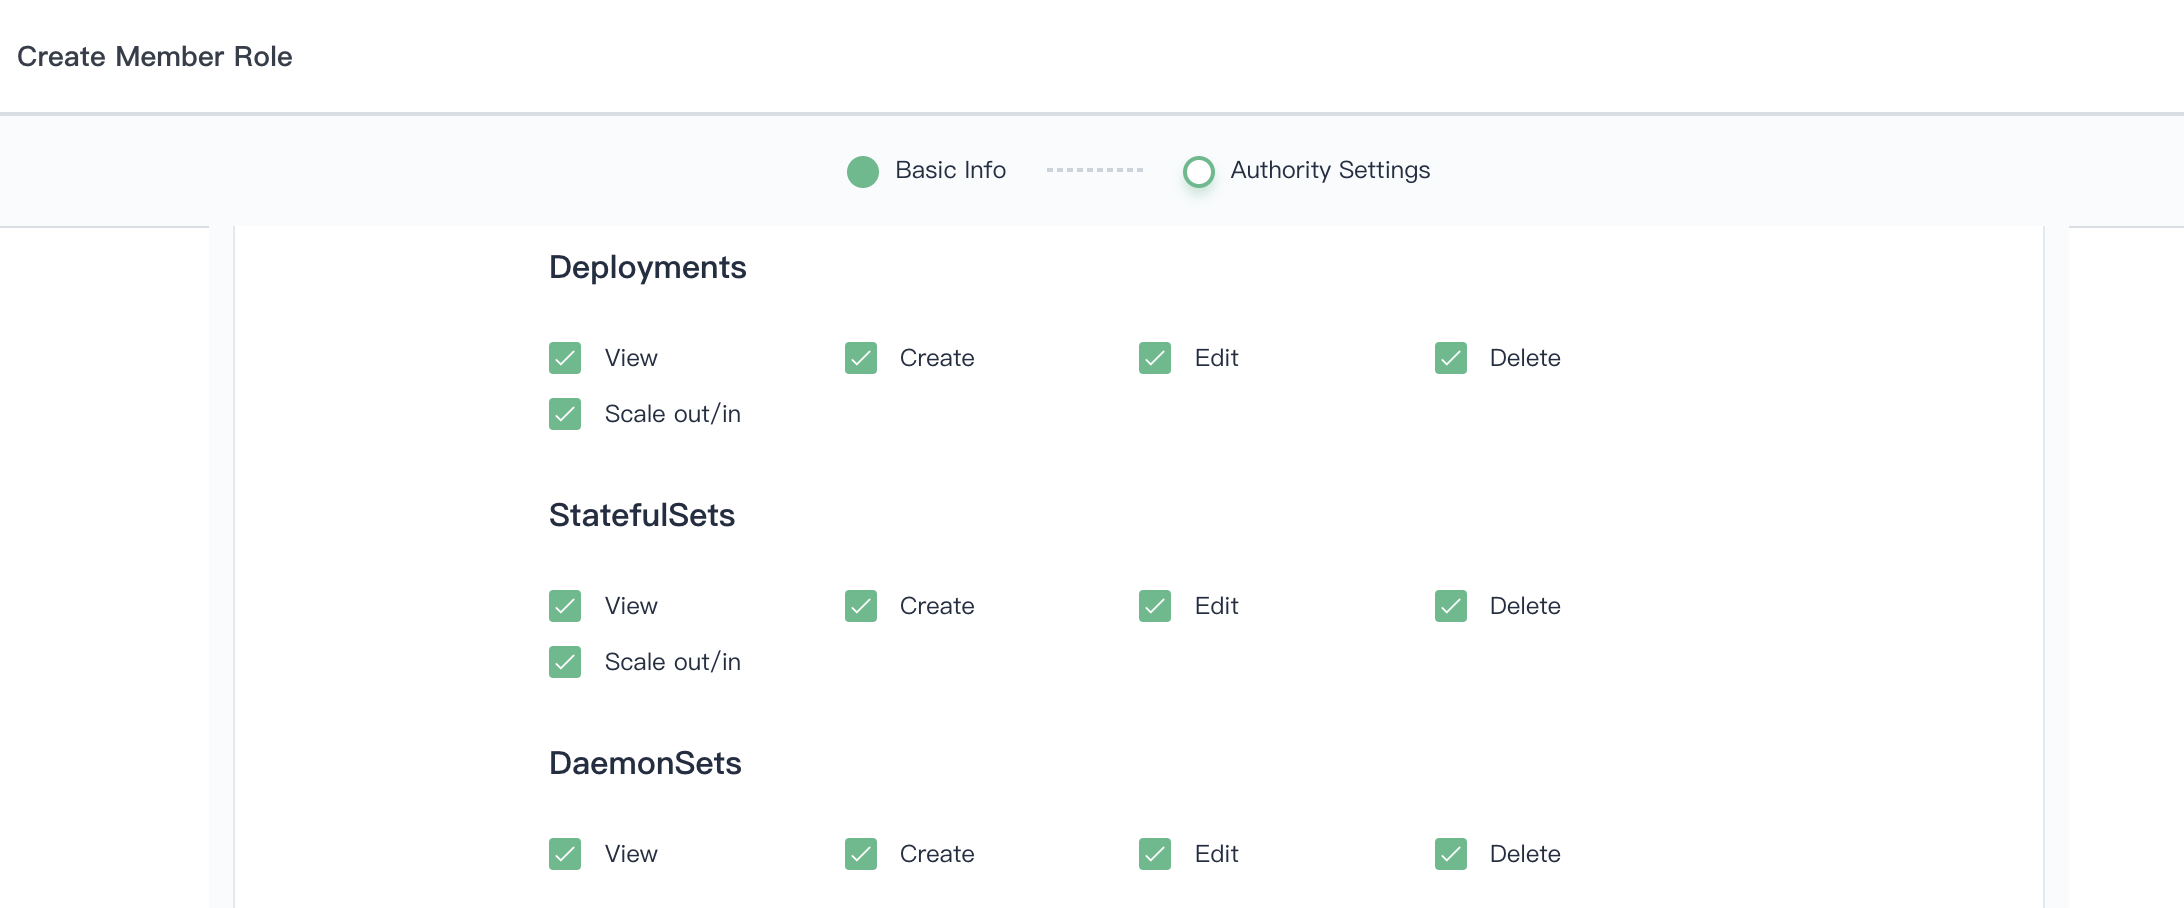
Step 2: Authority Settings

In the authority settings table, the project admin can customize the authority rules of a role to manipulate platform resources, and check the authority settings which are required for the role, such as view, create, edit, and scale out/in of the workload.

Note: Delete authority on resources should be granted carefully.

Authority Settings

View Authority Details

On the Role List page, click on the role (workload-operator), enter into the role details page to see the current list of role permissions and authorized users.

View Authority Details

Modify the Role Authority

Click on the Edit button to update description and the authority rules.

Deleting a Role

Click the Delete button to delete the role. Note that you need to unbind the user associated with the role before deleting the role firstly. The role in using cannot be deleted.