Installation
Intruction
Install on Linux
Install on Kubernetes
Related Tools
Cluster Operation
Quick Start
Cluster Admin Guide
Multi-tenant Management
Platform Management
Infrastructure
Monitoring Center
User Guide
Storage
Configuration Center
Project Settings
Development Guide
API Documentation
Storage Classes
The Storage Class is allow to be configured by the cluster admin and provide to users by type and parameter settings. Storage classes are usually created before storage volumes are created. Currently supported storage classes include following 6 types:
Note that if there are multiple storage classes in the system, only one can be set as the default storage class.
Create a Storage Class
Firstly sign in with cluster admin, select Platform → Infrastructure → Storage Classes, then enter into the storage classes panel. As a cluster-admin, you can view all of storage classes and details.

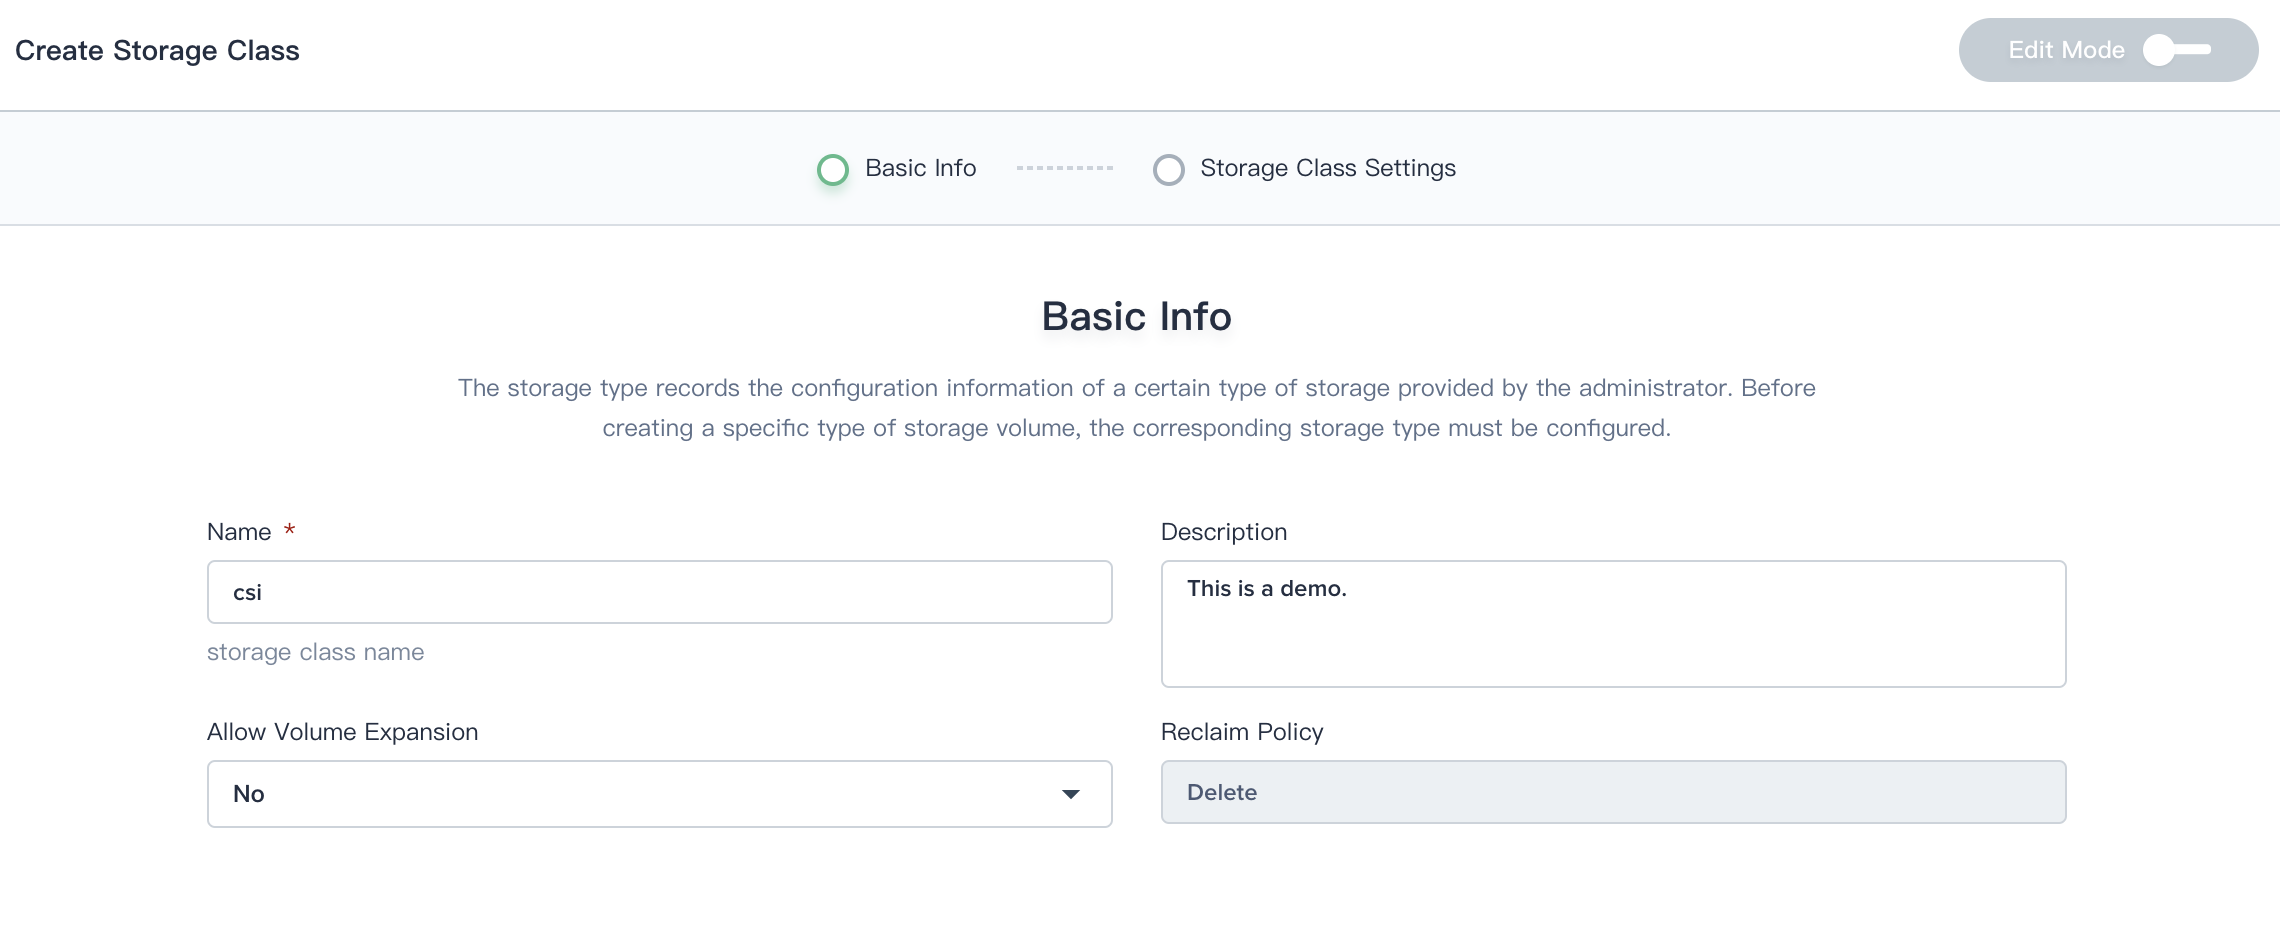
Step 1: Fill In the Basic Information
In the storage classes list, click Create and fill in the basic information:
- Name: a concise name for the storage class, easy for users to browse and search.
- Description information: describes the features of storage class in detail. When users want to know more about the storage class, the integrity of description content will become particularly important.
- Allow volume expansion: the switch of the volume is allowed to expand or not.
- Reclaim Policy: for volume plugins that support the Delete reclaim policy, deletion removes both the PersistentVolume object from Kubernetes, as well as the associated storage asset in the external infrastructure.
Step 2: Storage Class Settings
For example, for setting up QingCloud block storage plugin CSI-QingCloud, the parameters for other storage classes are explained in Storage Configuration Instructions.
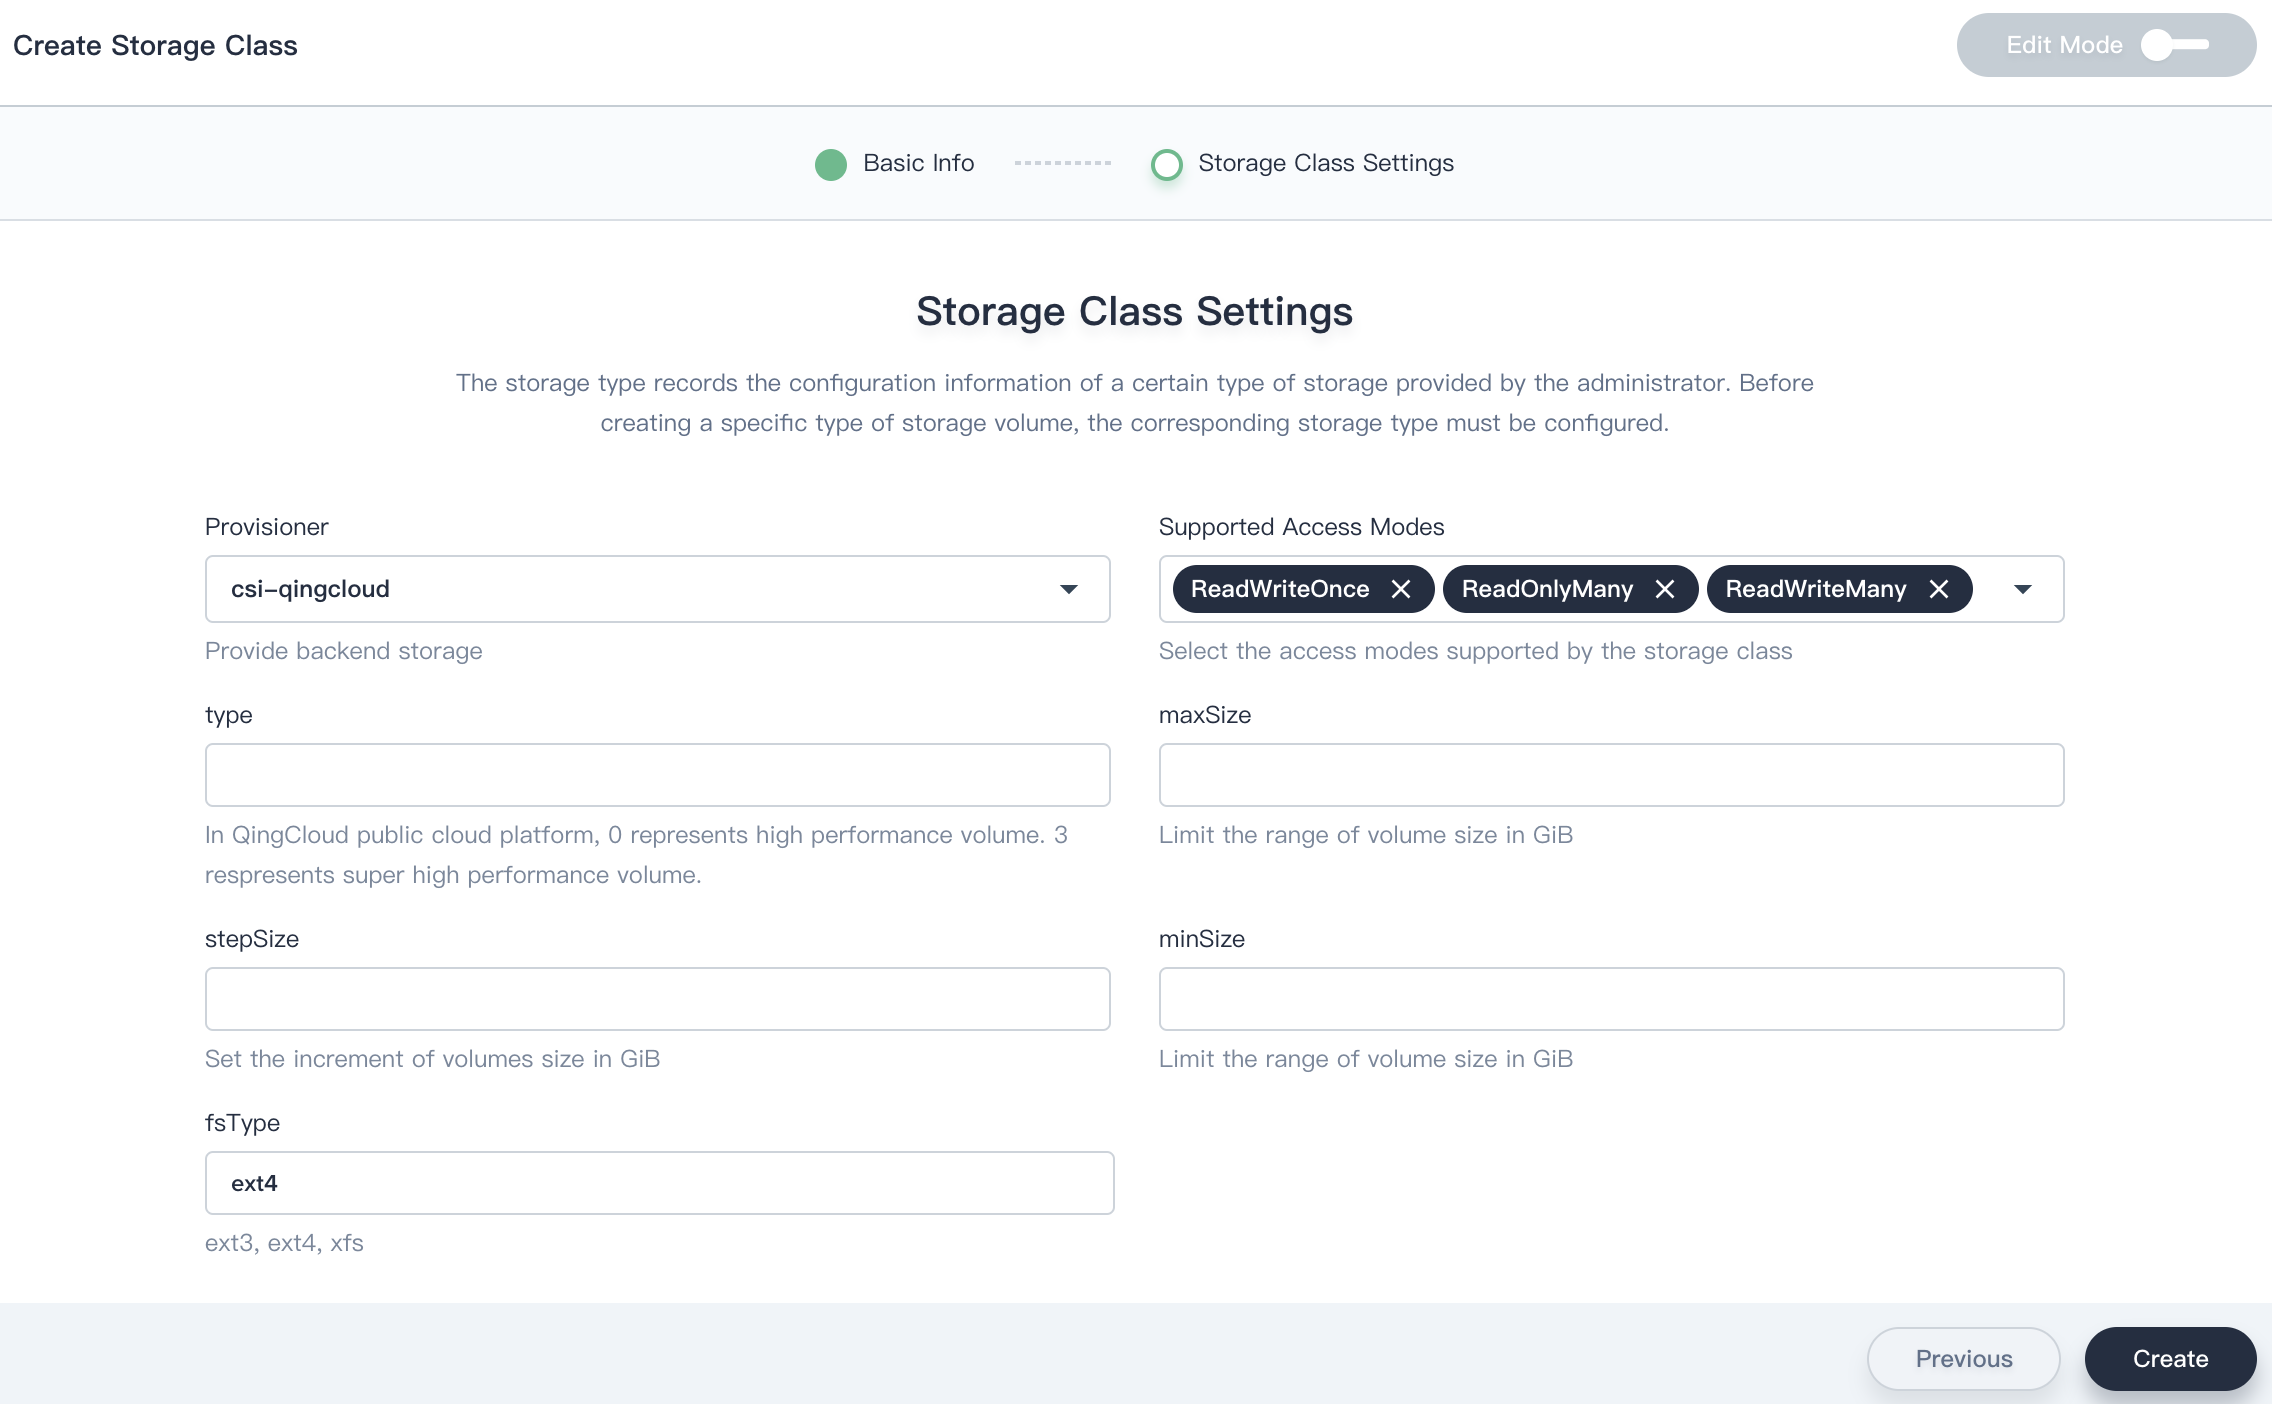
- Provisioner: essentially a storage allocator for deciding which volume plug-in to use for PV allocation, such as csi-qingcloud, Ceph RBD, or GlusterFS.
-
Access Modes: specifies the Access Modes of PV, each of which has its own Modes of Access that describe specific functionality. Note that a volume can only be mounted with one access mode at a time, even if it supports multiple access modes.
- ReadWriteOnce - this volume can be mounted by a single node in read/write mode.
- ReadOnlyMany - this volume can be mounted by multiple nodes in read-only mode.
- ReadWriteMany - this volume can be mounted by multiple nodes in read/write mode.
- type: The type of volume in QingCloud IaaS platform. In QingCloud public cloud platform, 0 represents high performance volume. 3 respresents super high performance volume. 1 or 2 represents high capacity volume depending on cluster‘s zone. 5 represents enterprise distributed SAN (NeonSAN) volume. 100 represents basic volume. 200 represents SSD enterprise volume. See QingCloud Docs for details.
- maxSize, minSize: Limit the range of volume size in GiB.
- stepSize: Set the increment of volumes size in GiB.
- fsType: ext3, ext4, xfs. Default ext4.
- replica: 1 means single replica, 2 means multiple replicas. Default 2.
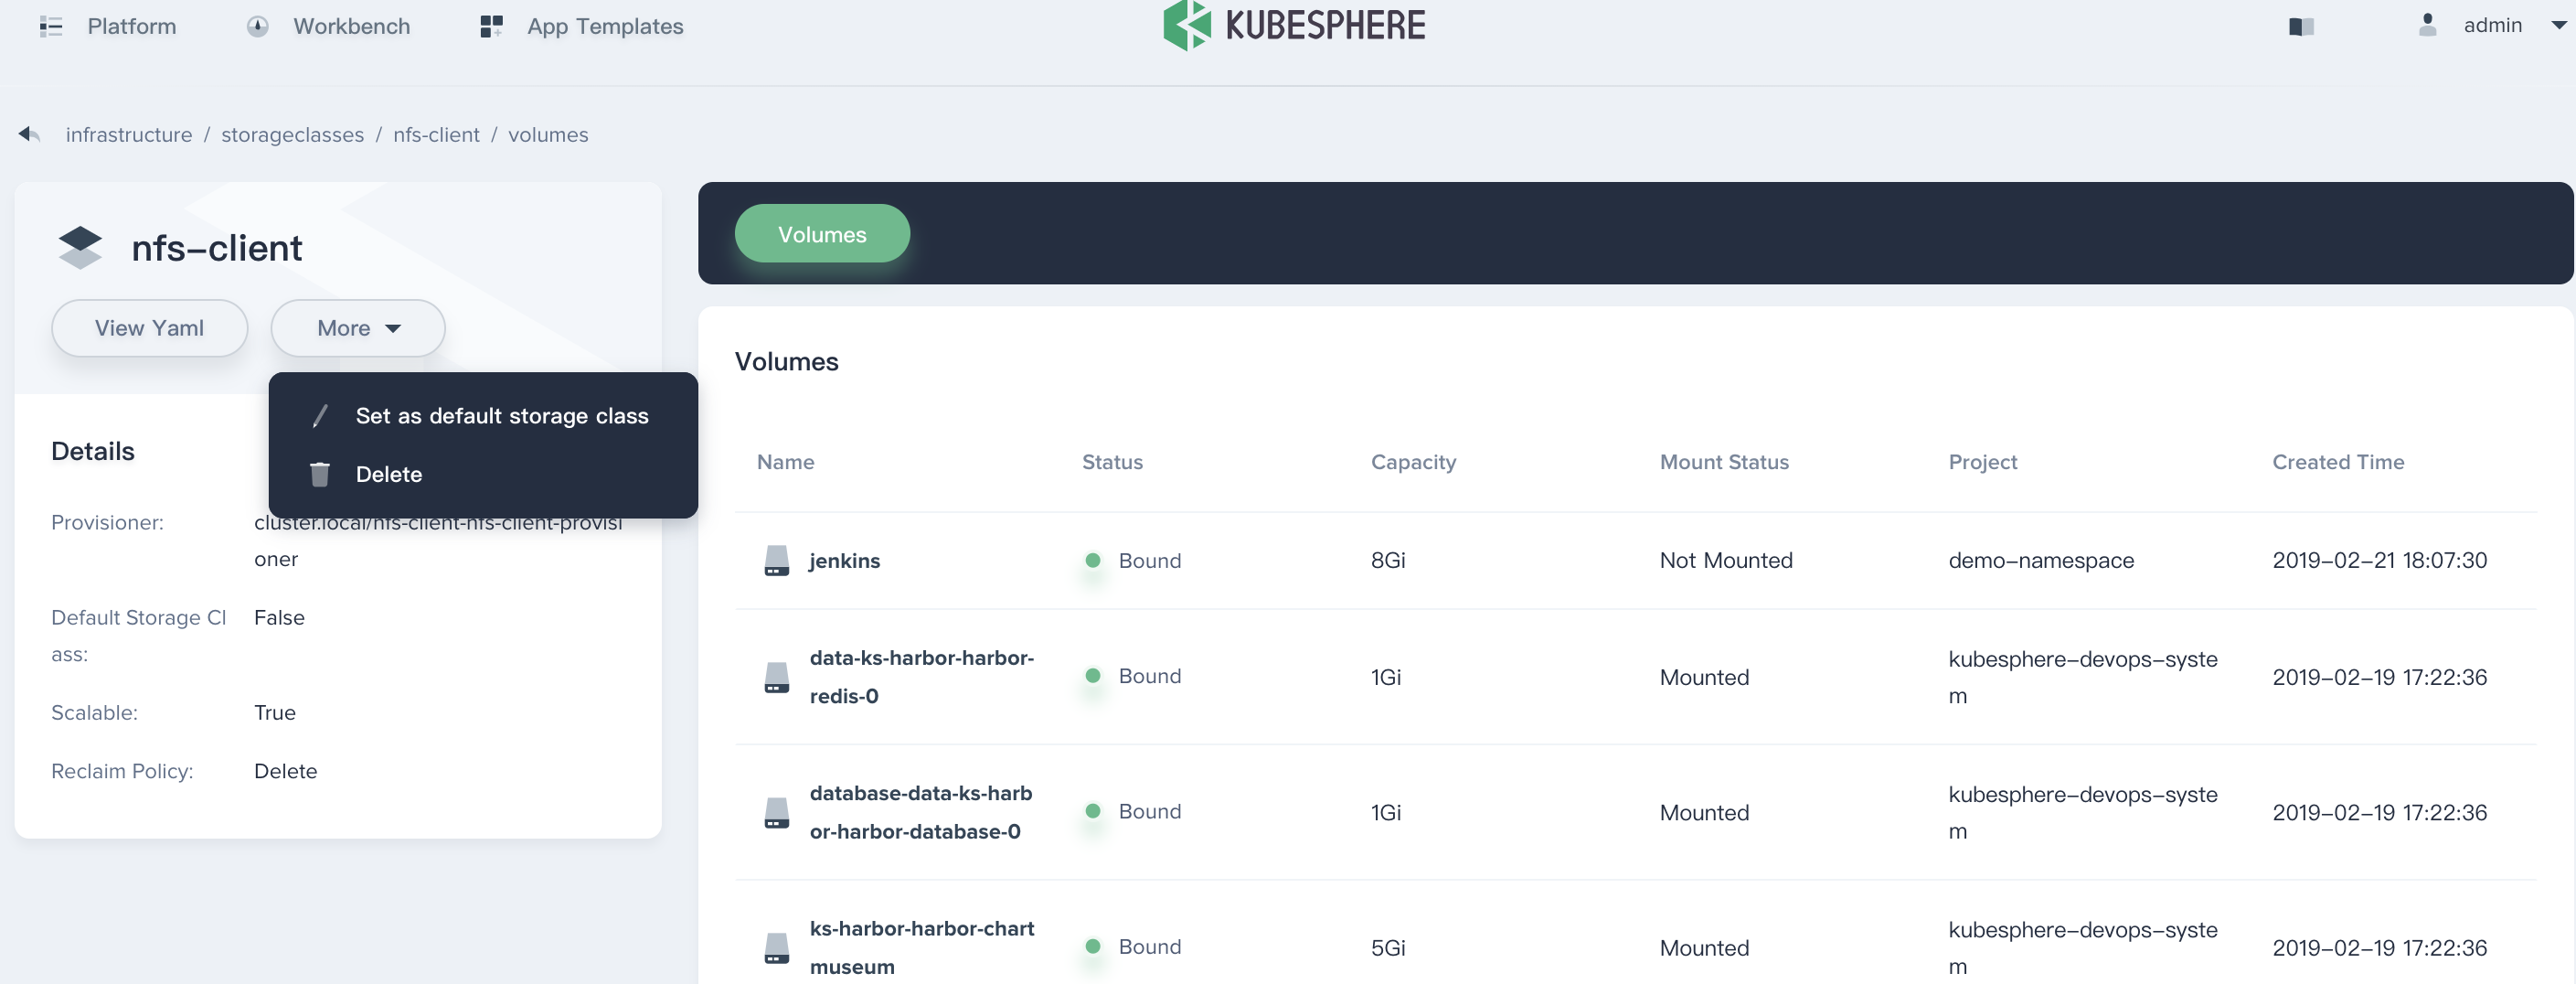
Set the Default Storage Class
Only one default storage class is allowed set in a KubeSphere. Click into one of the storage classes, and choose More → Set as default storage class. If you need to delete the storage class, it's obviously to see.